After completing the deployment of GeekAI, you need to add an API KEY to use the AI chat feature. We recommend using relayed tokens as they are cheaper, easy to configure, and do not require a VPN. You can also set up your own aggregated API system using one-api Build your own One-API platform.
API Token Channel Selection
API Selection Tips
When choosing an API relay provider, do not just look at the price; consider the following factors comprehensively:
- Model Rate: Some relays may offer low recharge prices, but their model rates are higher than the official ones, leading to faster consumption of your computing power. For example, $100 worth of computing power might allow 10,000 calls on one relay but only 1,000 on another.
- Response Speed: Relayed APIs inherently have an additional forwarding step, making them slower than direct connections. If the relay's servers and network are unstable, the delay on your client side will be significant, negatively impacting user experience.
- Channel: Many relays are cheaper because they use mismatched channels, such as passing off AZURE APIs as OpenAI APIs (a common practice) or even using fine-tuned open-source models to impersonate commercial models, which is hard for most people to detect.
Here are three recommended GPT token relay websites. The administrators of these sites are in the WeChat technical exchange group (contact the author to join). You can provide feedback in the group if you encounter any issues.
- https://api.aiggr.com: Offers pure official relay channels and AZ hybrid channels. The pure official relay channels have higher rates, making them more expensive despite lower recharge prices, especially for GPT-4 series models. However, they are still cheaper than OpenAI's official prices. The API response speed is the fastest, supports high concurrency, and provides a great experience.
- https://api.aiggr.com: Uses reverse-engineered + AZ hybrid channels with rates identical to the official ones. The advantage is lower prices for MJ and stable speeds. The reverse-engineered models are powerful, especially the gpt-4o reverse-engineered model, which supports internet access, image and file parsing. The biggest advantage is the super-fast response time for GPT-4O series models, typically under 0.x seconds.
Supports MidJourney, GPT, Claude, Google Gemmi, Suno, and domestic large models. Currently offers super discounts, with prices far below OpenAI's official rates. You can freely use GPT-3.5, GPT-4, DALL-E3 drawing, etc., without needing a VPN.
Note: The above is based on my personal testing experience and may not be entirely accurate. I strongly recommend testing the API speed and rates of each provider before deciding which one to purchase. Additionally, relays can sometimes be unstable, so it's advisable to have a backup relay.
If you want to integrate third-party relay APIs into your AI application, refer to the Relay API Documentation.
How Relay APIs Work
Relay APIs are essentially pools of OpenAI/Gemini/Claude/MidJourney API accounts obtained through certain channels. The relay provider sells you a token, allowing you to send AI requests to their pool. The pool uses an algorithm to select an API account to forward your request to the backend model and then relays the response back to you.
Understanding this process reveals the following characteristics of relay APIs:
- Token-Pool Matching: The token must match the pool. In other words, you must use the API address of the provider where you purchased the token; otherwise, you will receive an "Invalid Token" error. You cannot use a token from one pool to consume resources from another.
- High Concurrency Support: Since the pool contains many accounts, the theoretical concurrency of a relay API is the sum of the concurrency of all accounts in the pool. A typical pool may have hundreds of accounts, enabling high-concurrency calls.
- Slower Speed: Relay APIs are inherently slower due to the additional forwarding steps. However, this delay is negligible compared to the latency of using a VPN to call the official API. If you use a dedicated VPN like the relay API, the speed will be slightly faster.
- Occasional Call Failures: Failures can occur for two reasons:
- Account Bans: If the account selected from the pool for your call is banned, the call will fail. Some relay providers implement retry mechanisms, but this slows down the response. Account bans are the biggest risk for relay providers, as they bear the cost.
- Rate Limits: OpenAI imposes strict TPM (Tokens Per Minute) and RPM (Requests Per Minute) limits on each API account. Exceeding these limits will cause calls to fail. This is especially common for
gpt-4-all(reverse-engineered API) anddalle-e-3models, which have very low concurrency limits and are the most expensive.
- Lower Prices: Typically less than half the official price. This is because the cost of purchasing a $5 API account is much lower.
- Reverse-Engineered API Support: Reverse-engineered APIs are pools of ChatGPT PLUS accounts, allowing you to use ChatGPT PLUS features and call GPTs. The implementation cost is higher, and they are less stable than regular APIs.
Creating a Token
Relay platforms generally use similar templates, so the operations are also similar. Here, we demonstrate using https://api.aiggr.com.
First, log in to https://api.aiggr.com and create a token.
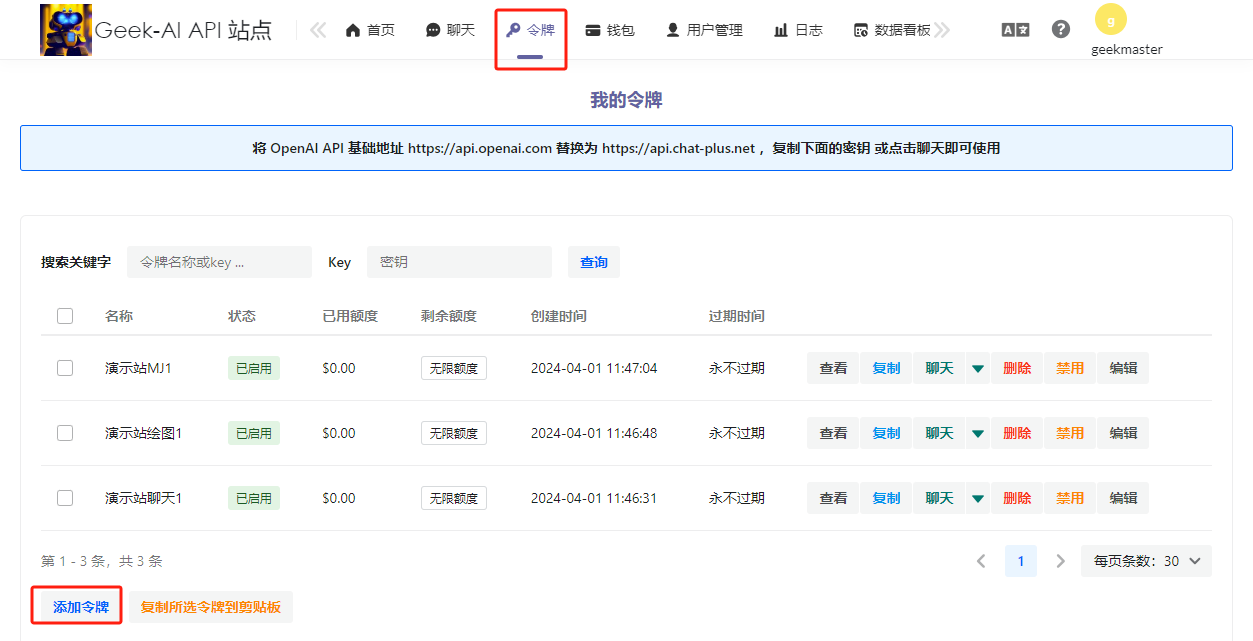
The two main parameters to focus on are Validity Period and Quota. If the token is for personal use, select Never Expires and Unlimited Quota. For others, configure these based on your needs.
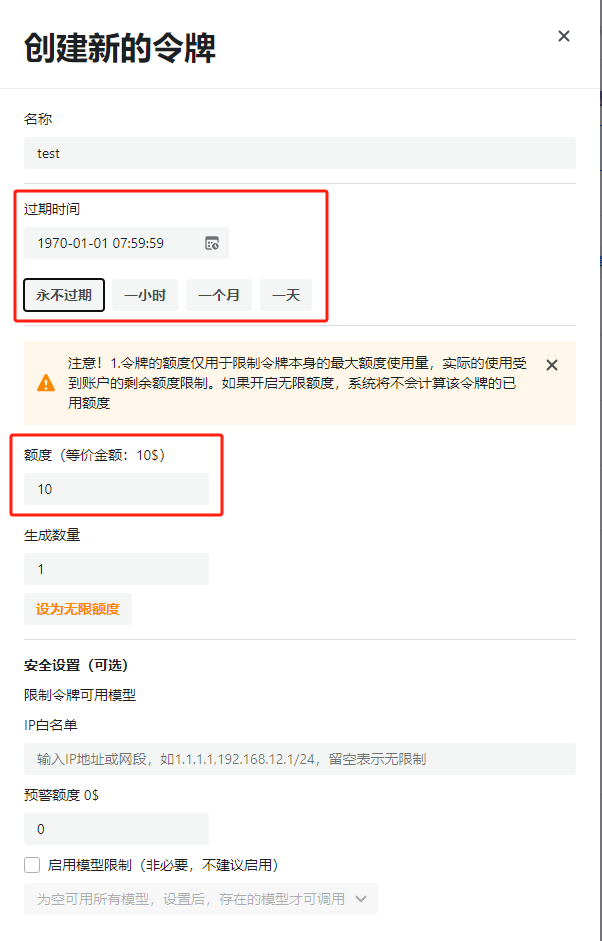
It's recommended to create three tokens: one for chat, one for Dalle3 drawing, and one for MidJourney drawing.
Adding a Token
Log in to the Chat-Plus Admin Dashboard, select the API-KEY menu, and click the "Add APIKEY" button.
Tips:
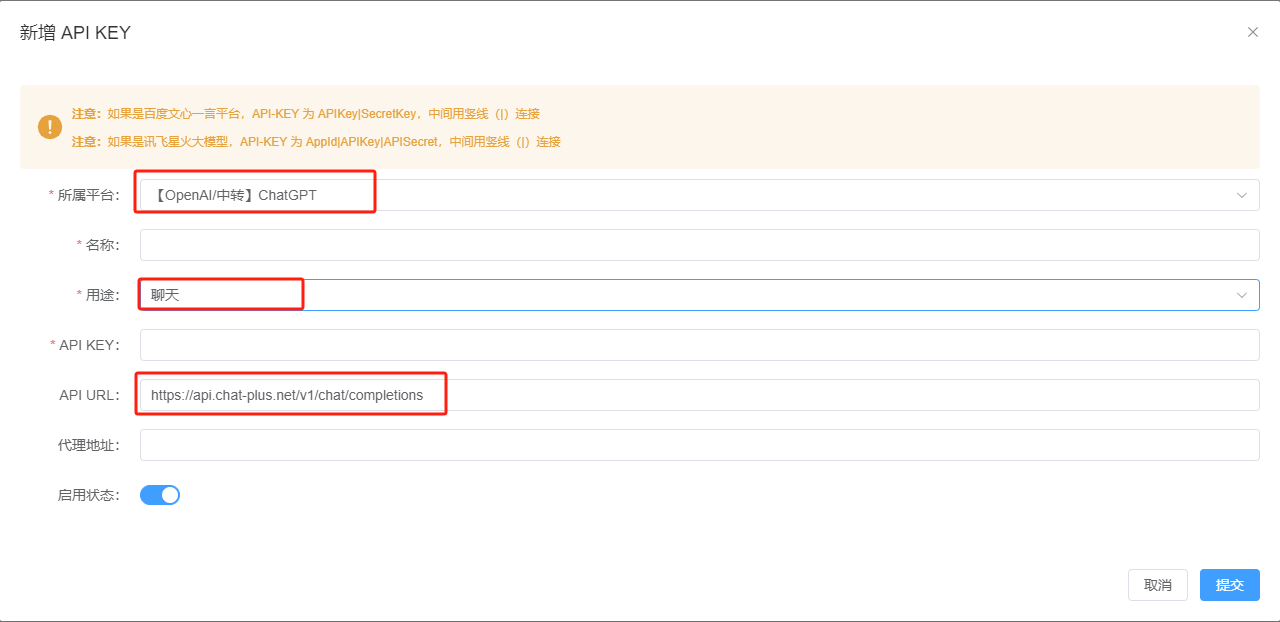
- For versions before v4.1.1: You need to fill in the detailed address, such as
https://api.aiggr.com/v1/chat/completions. For v4.1.1 and later versions, only the BASE URL is required, e.g.,https://api.aiggr.com. - For Relay KEYs: Since they aggregate APIs from all platforms (including Baidu Wenxin, iFlytek, Tongyi Qianwen, Suno, etc.), always select the
OpenAI/ChatGPToption in the "Platform" field, regardless of the platform you intend to use. - For Dalle3 Drawing Support: Add a "Drawing" model by selecting "Drawing" in the "Purpose" field.
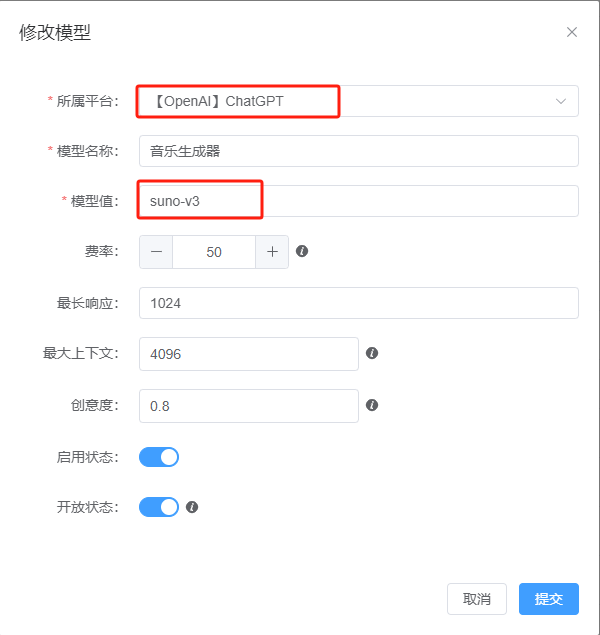
If you want to add a model supported by the relay (e.g., Suno for music generation), select the platform and fill in the model name.
Reverse-Engineered Models
Models like gpt-4-all, gpt-4o-all, and o1-pro-all (those with --all suffixes) are reverse-engineered models. They replicate the functionality of the ChatGPT official website, allowing you to experience all ChatGPT PLUS features without a VPN. You can freely use all plugins available in ChatGPT-Plus with smooth performance. Here are some examples:
Internet Access
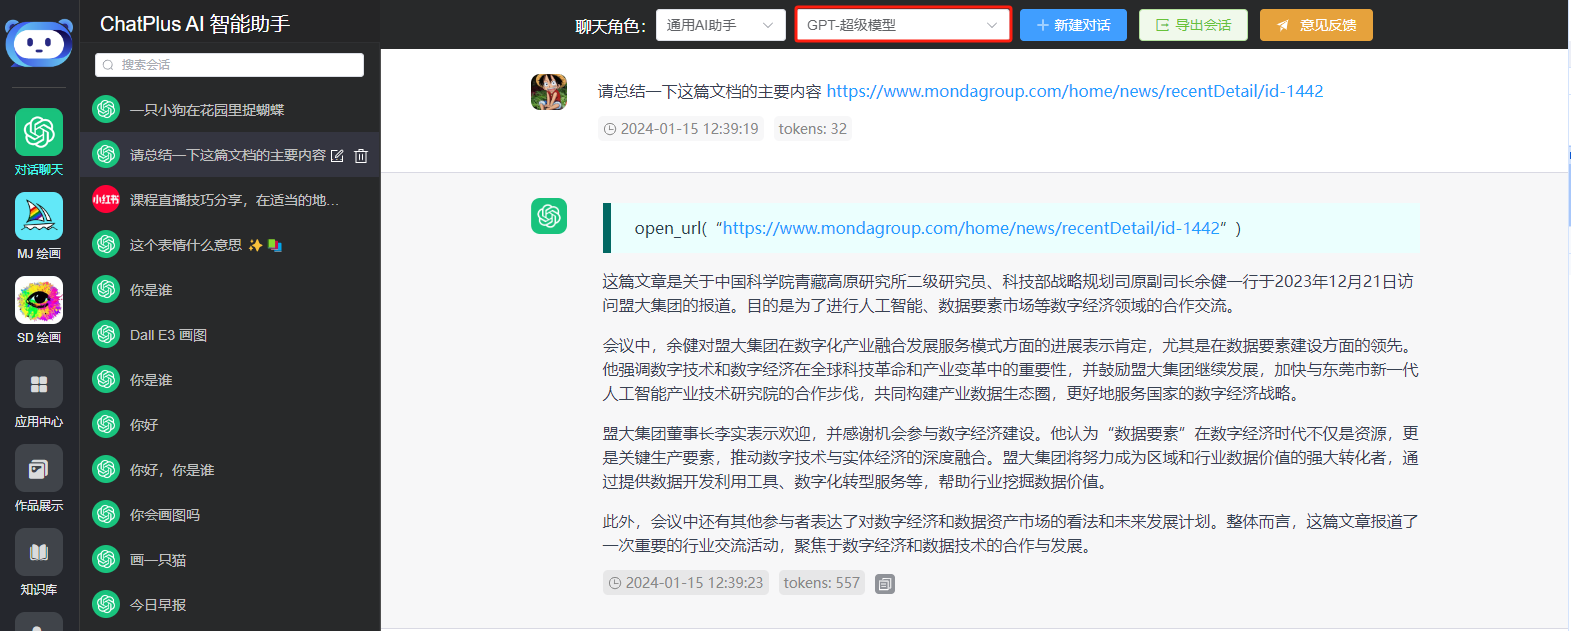
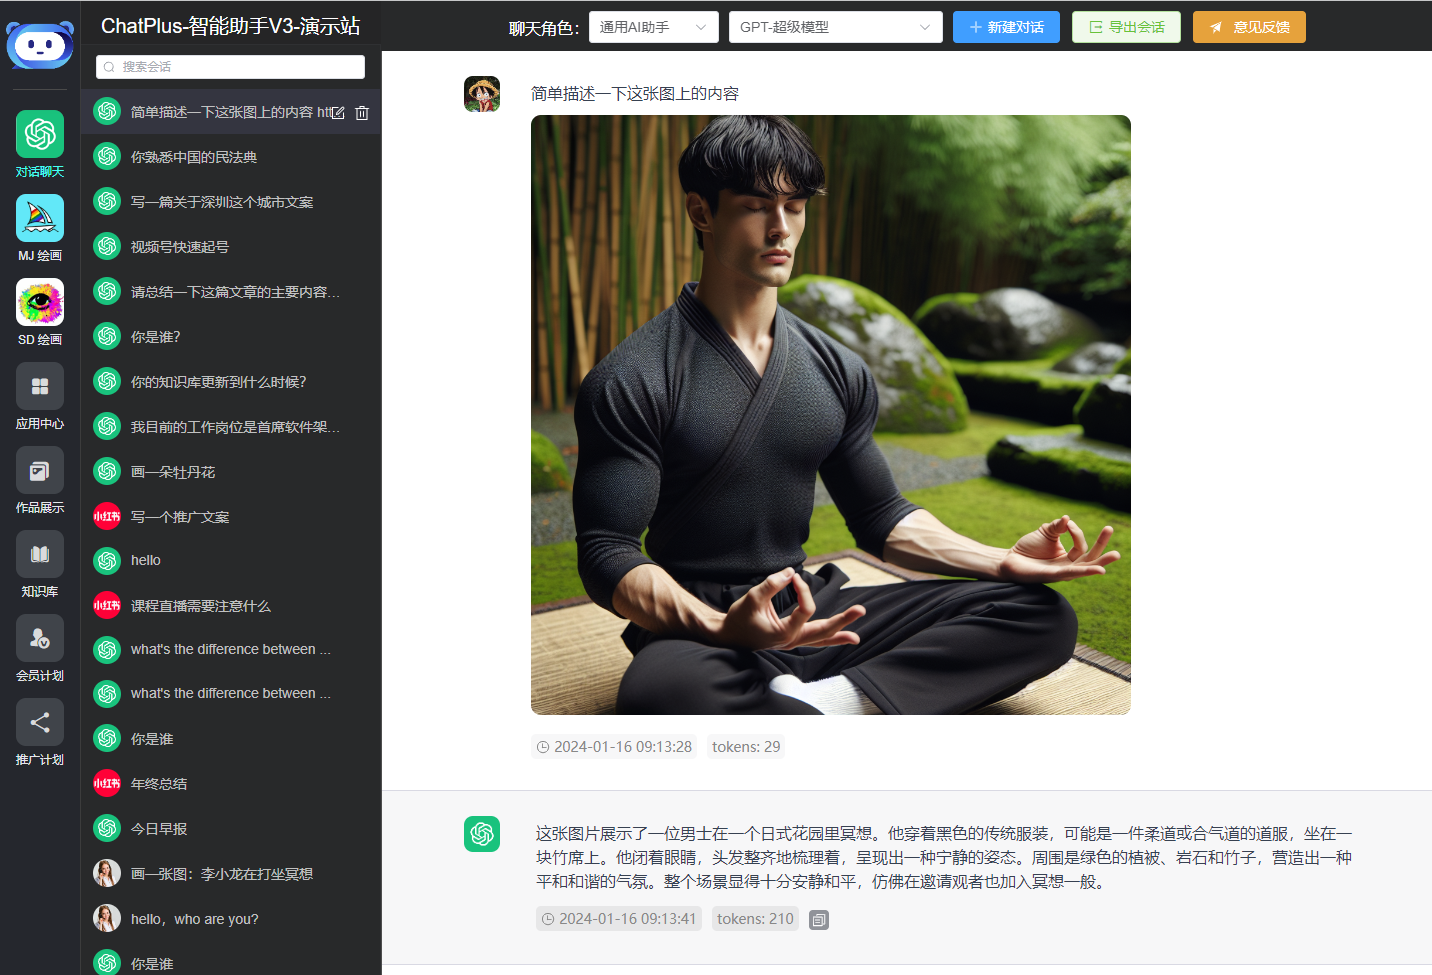
Image Recognition
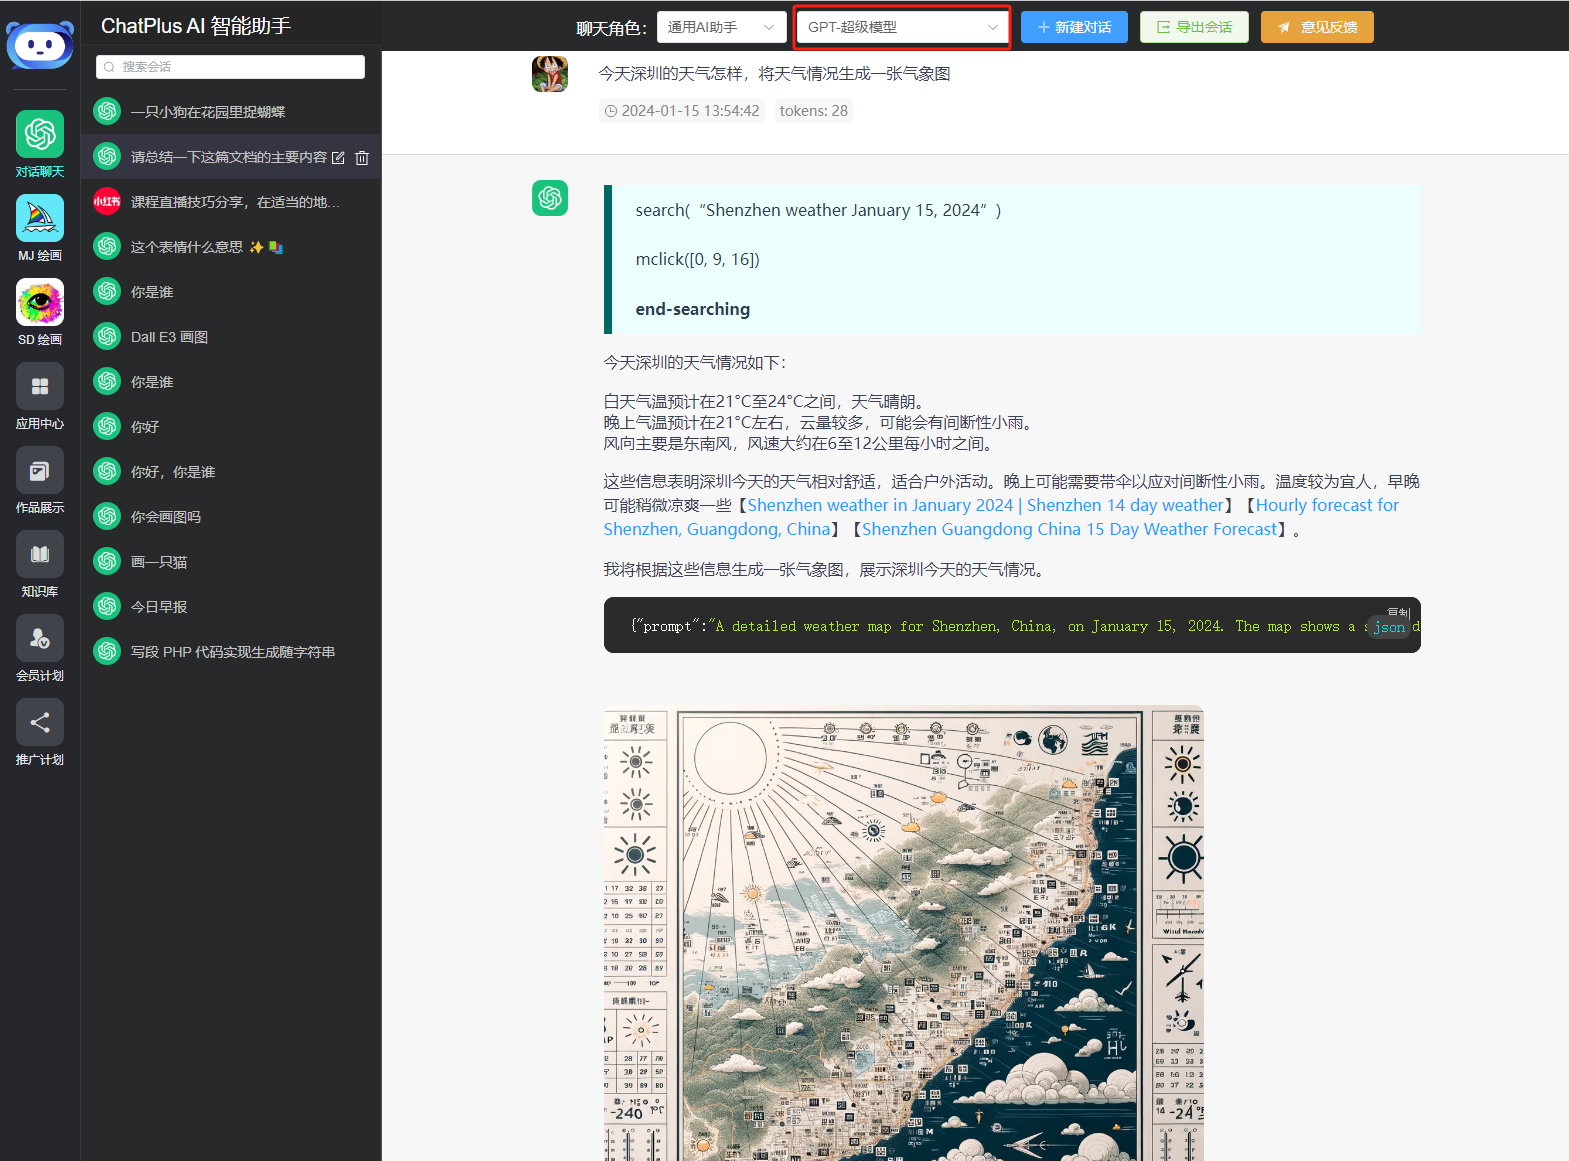
Search + Image Recognition + Drawing
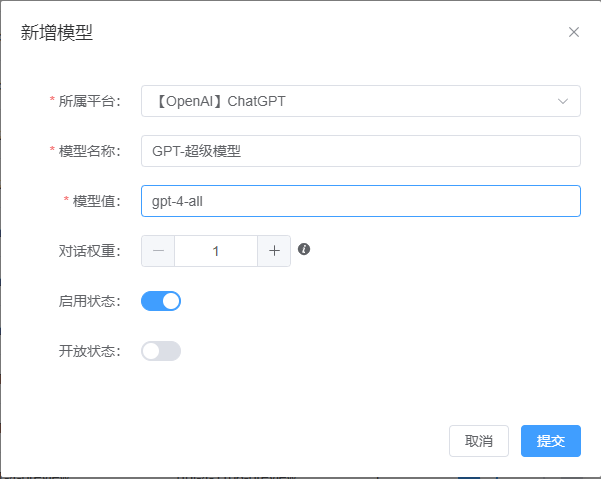
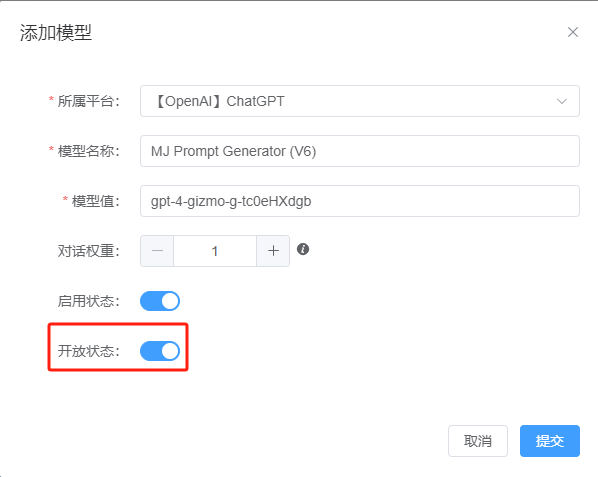
Configuration is simple. Log in to the admin dashboard, go to the Model Management menu, and click the "Add Model" button.
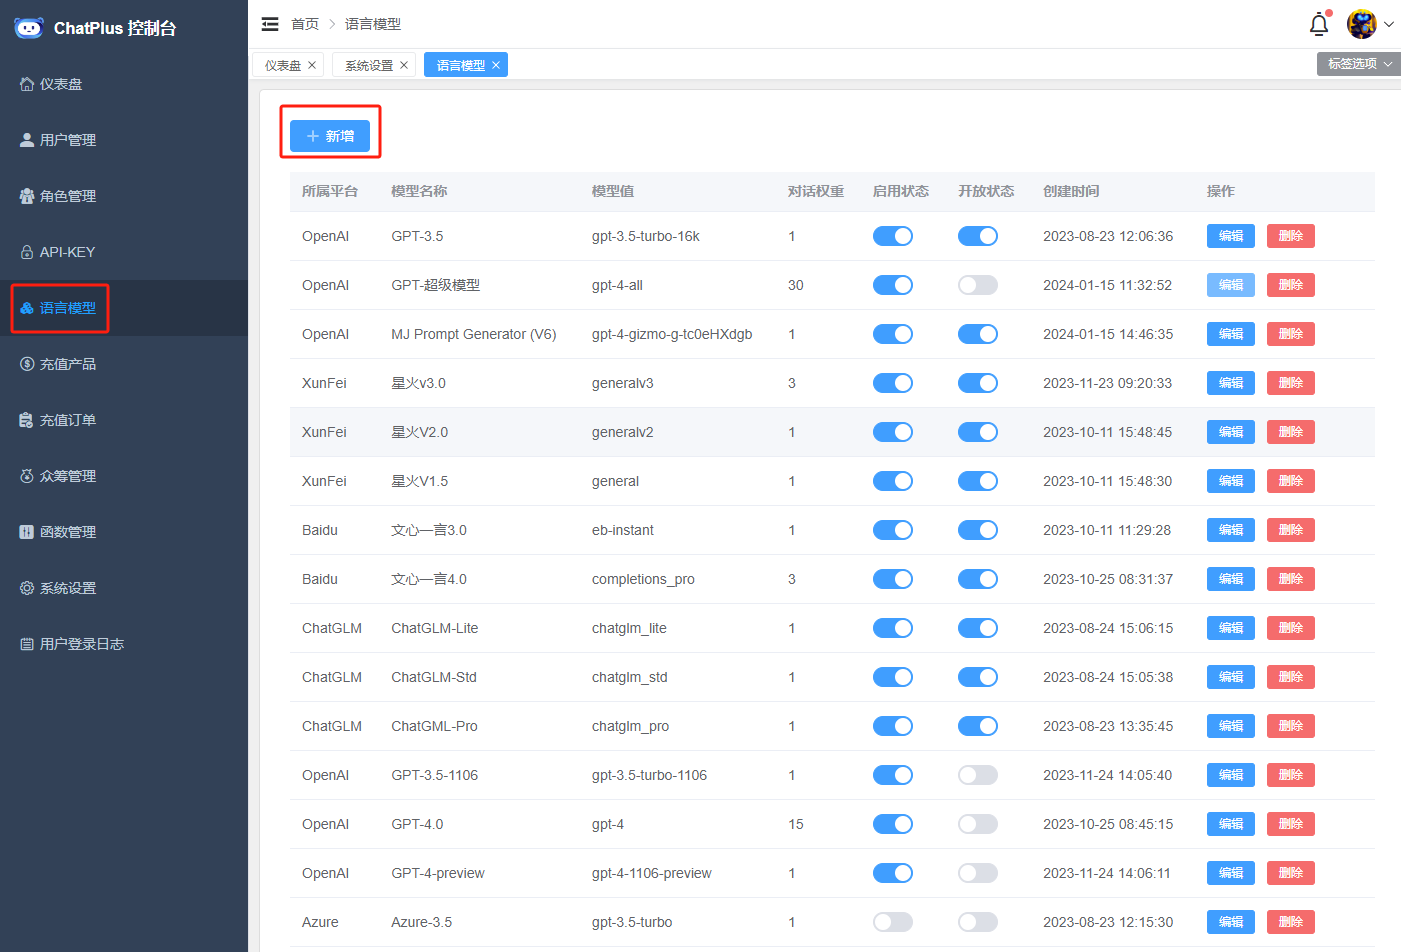
Then add a gpt-4-all model.
GPTs Applications
Currently, gpt-4-gizmo-g-* GPTs applications are fully supported. The configuration method is the same as for GPT4-Super Models. Simply add a model for each GPTs application in the admin dashboard.
Obtaining GPTs ID
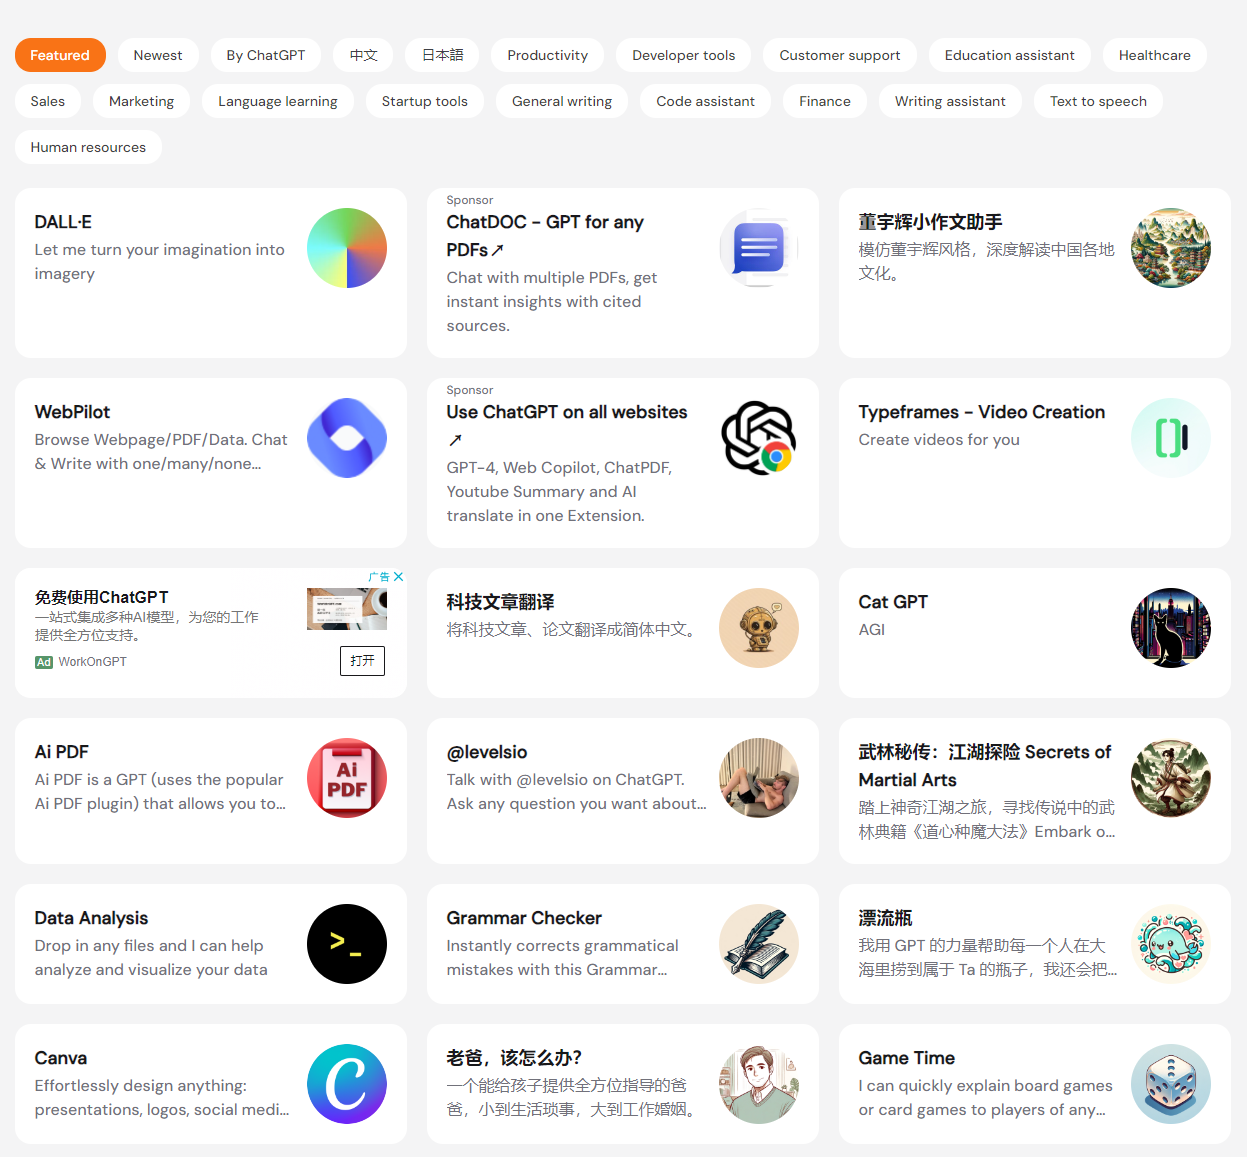
First, visit Discover GPT Store to search for the desired GPTs.
Click on the GPTs you want to add, go to the details page, and right-click "Use xxx on ChatGPT" to copy the link address.
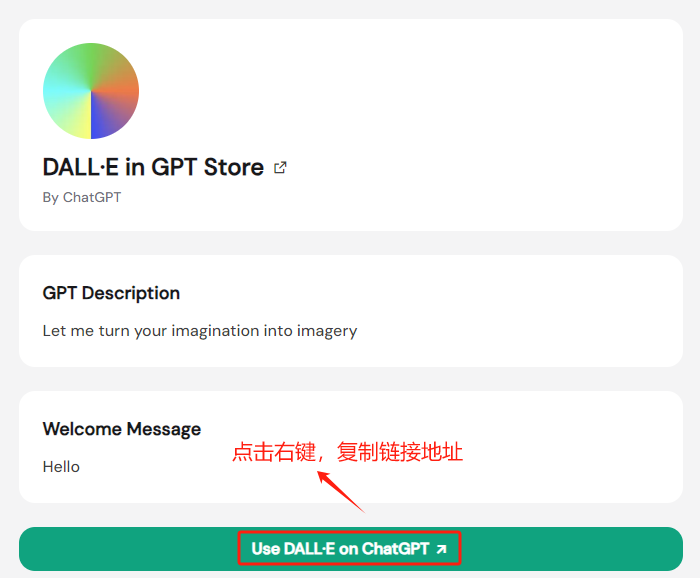
The copied link will look like this:
https://chat.openai.com/g/g-2fkFE8rbu?utm_source=gptshunter.comThe g-2fkFE8rbu part is the GPTs application ID.
Adding a GPTs Model
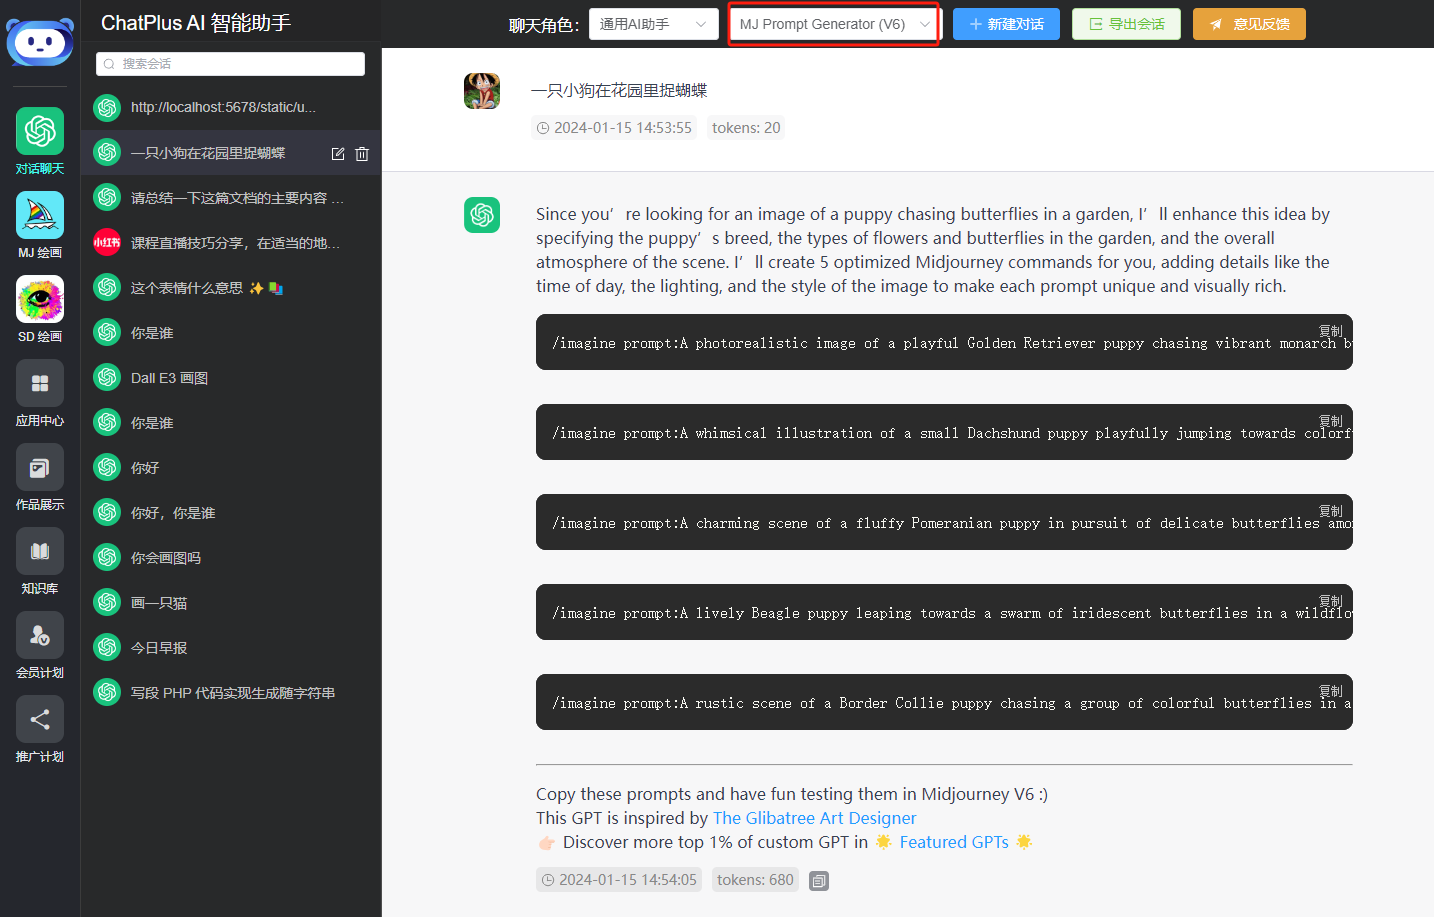
Copy the GPTs ID and add it in the admin dashboard.

You can now use this GPTs. Below is a demo screenshot of a MidJourney prompt GPTs I added.
Open Models
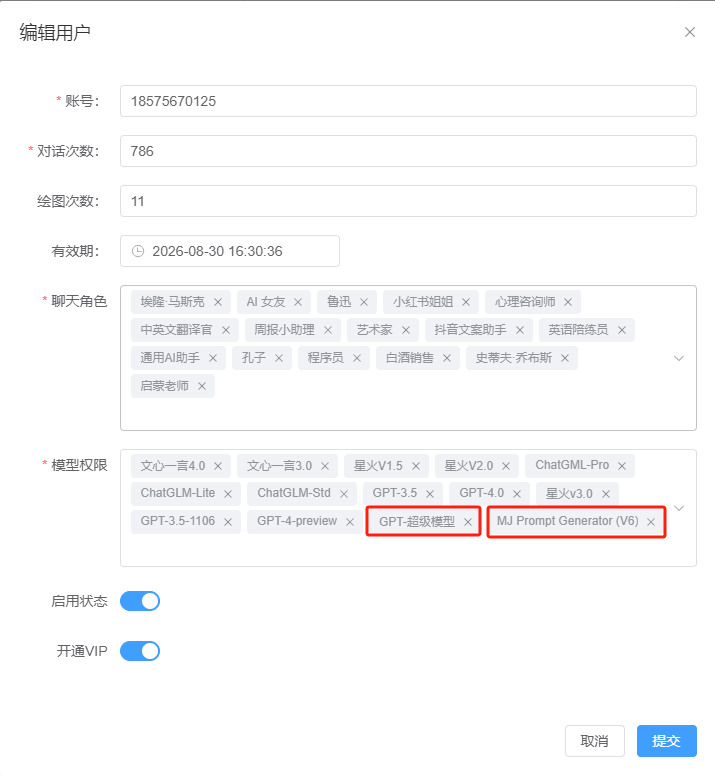
If the model you added does not appear in the frontend chat model list, it means the current user does not have permission for this model. There are two ways to resolve this:
- Open the Model to All Users: Edit the model in the admin dashboard and toggle the "Open Model" switch.
- Add Model Permission for the User: Go to the User List in the admin dashboard, edit the user, and add the model permission under "Model Permissions."
One-API Platform Setup
Why Use One-API?
Starting from v4.1.1, GeekAI will no longer support multi-platform APIs and will only support OpenAI-format large model APIs for the following reasons:
- The increasing number of large models makes the codebase bloated and harder to maintain.
- one-api is an excellent open-source framework for aggregating large model APIs. It is simple to use, powerful, and supports almost all mainstream models, including local models like ollama. There's no need to reinvent the wheel.
With one-api, you can easily aggregate APIs from different platforms (OpenAI, Claude, Azure, Google, Spark, Baidu, ByteDance, local models, etc.) and provide a unified API interface for your application. This reduces coupling in your application.
Additionally, aggregated channels can be further aggregated. For example, if each relay supports 1000 concurrent calls, aggregating three relays will give you 3000 concurrent calls, significantly improving your application's API concurrency.
Deployment
First, pull the Docker image. The latest Docker image might be an alpha version, so we manually specify the stable version (v0.6.7 at the time of writing).
Using SQLite:
docker run --name one-api -d --restart always -p 3000:3000 -e TZ=Asia/Shanghai -v /home/ubuntu/data/one-api:/data justsong/one-api:v0.6.7Using MySQL: Add -e SQL_DSN="root:123456@tcp(localhost:3306)/oneapi" to the above command, modifying the database connection parameters as needed.
docker run --name one-api -d --restart always -p 3000:3000 -e SQL_DSN="root:123456@tcp(localhost:3306)/oneapi" -e TZ=Asia/Shanghai -v /home/ubuntu/data/one-api:/data justsong/one-api:v0.6.7The first 3000 in -p 3000:3000 is the host port, which can be modified as needed.
Data and logs will be saved in /home/ubuntu/data/one-api on the host. Ensure this directory exists and has write permissions, or change it to a suitable directory.
If the image cannot be pulled, try using GitHub's Docker image by replacing justsong/one-api with registry.cn-shenzhen.aliyuncs.com/geekmaster/one-api.
Alternatively, use docker-compose by copying the following content to docker-compose.yaml:
services:
  redis:
    image: 'registry.cn-shenzhen.aliyuncs.com/geekmaster/one-api:v0.6.7'
    container_name: 'one-api'
    restart: always
    environment:
      - TZ="Asia/Shanghai"
      #- SQL_DSN="root:123456@tcp(localhost:3306)/oneapi"
    ports:
      - '3000:3000'
    volumes:
      - ./data:/data
Then run docker-compose up -d to start.
Configuration
Access http://localhost:3000, log in with root/123456, and click "Channels."
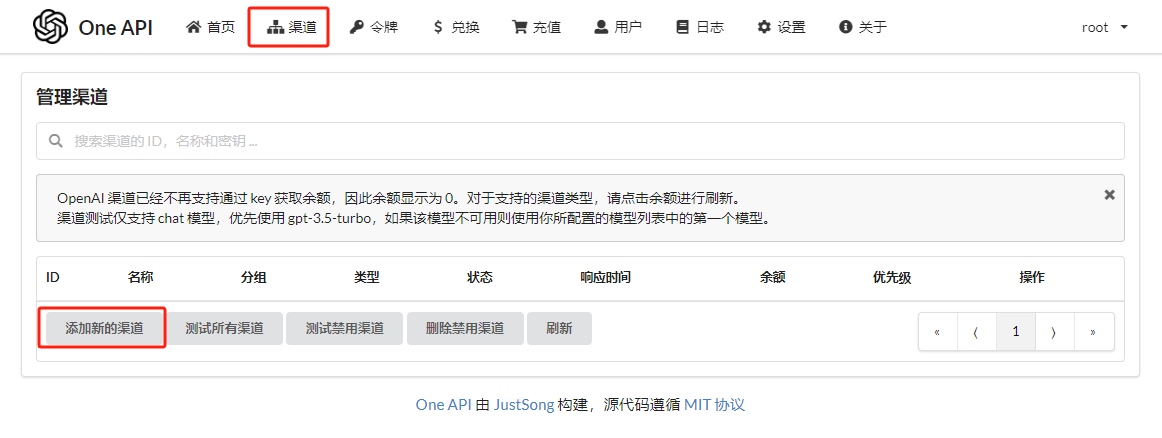
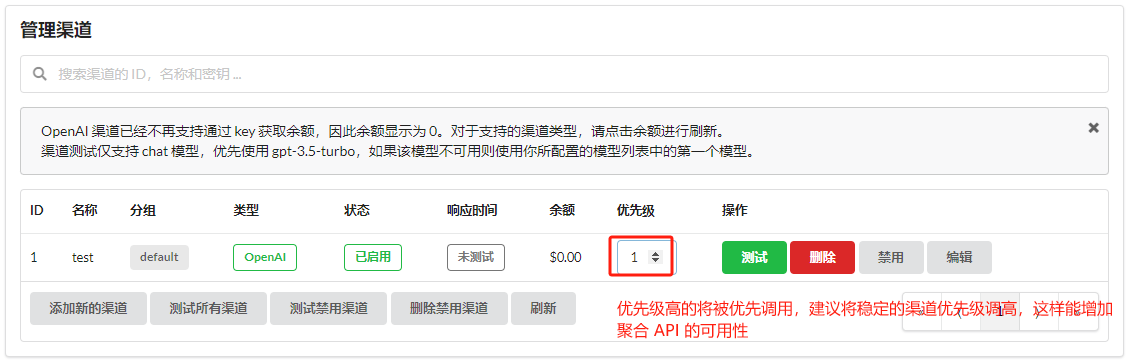
Click "Add New Channel," fill in the channel information, and save.
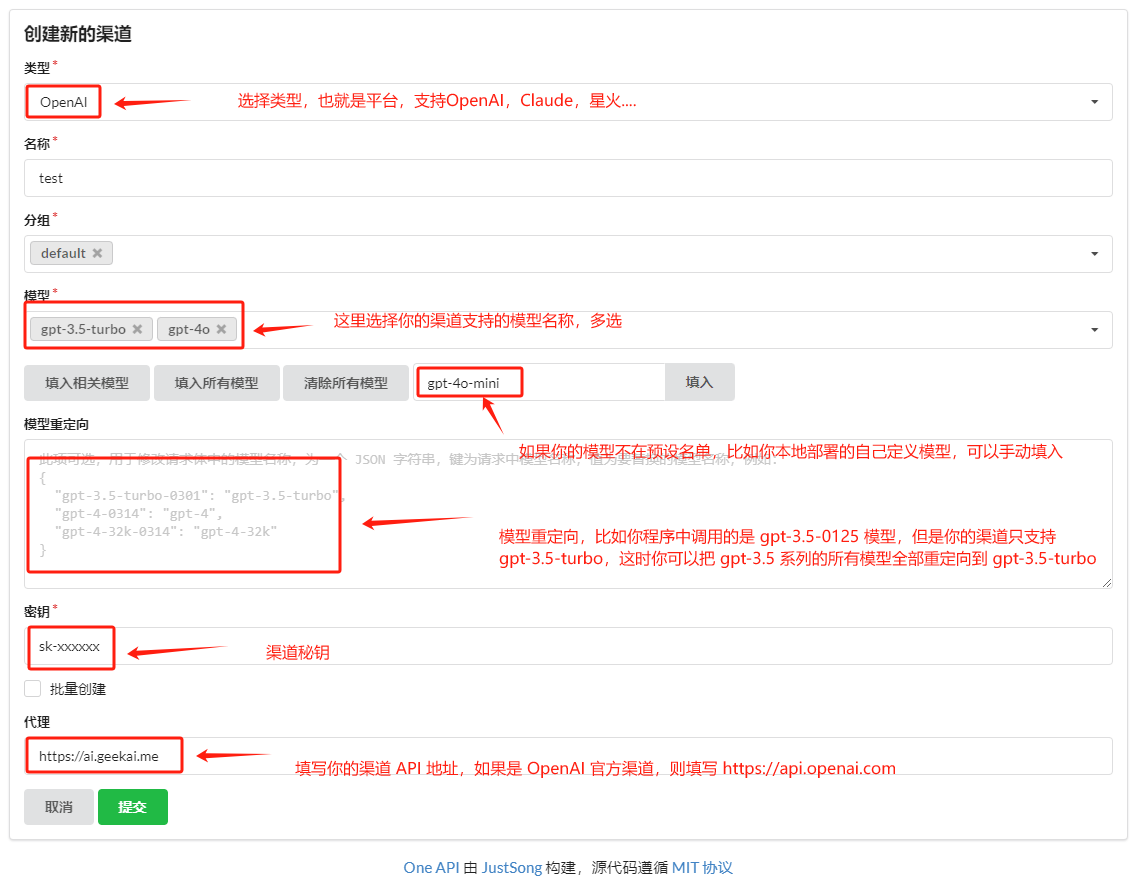
Note: Channels can be single-platform (e.g., OpenAI, Kimi, Baidu) or aggregated (e.g., relay APIs). For aggregated channels, list all supported models in the "Models" field.
You can also set channel priorities in the channel list. Higher-priority channels are called first, improving API availability.
Usage
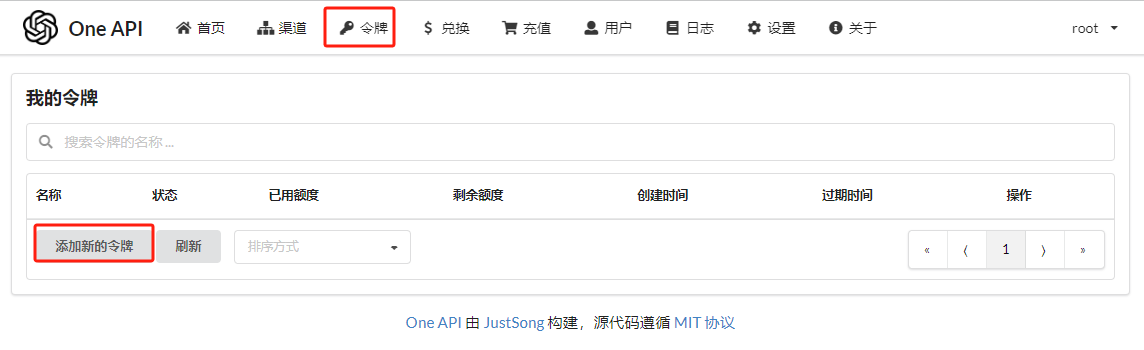
After configuring the channels, one-api is ready to use. First, create a token.
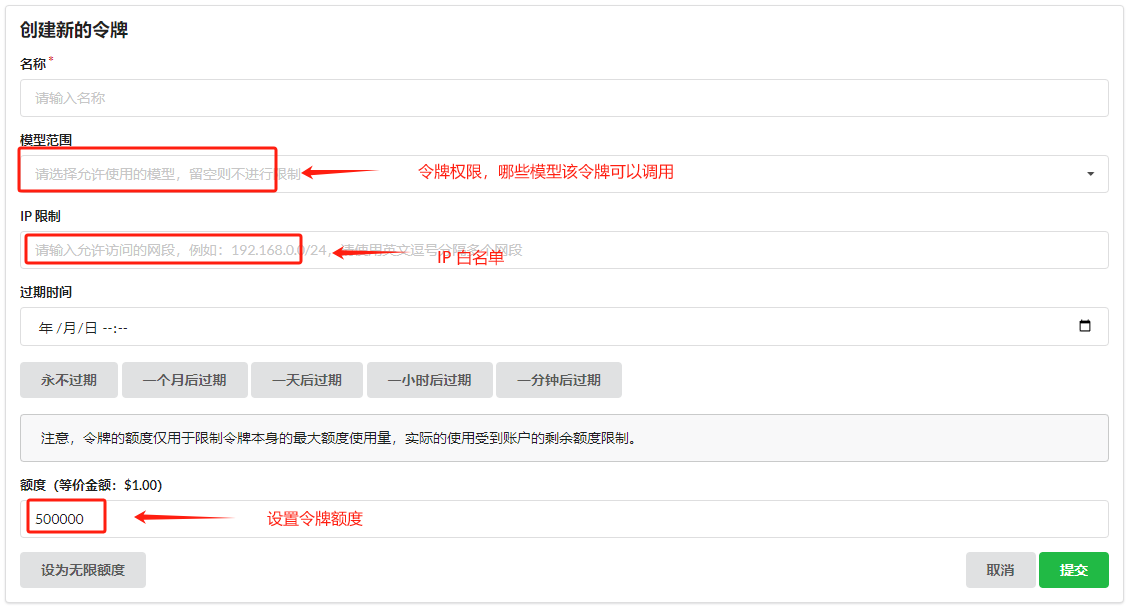
Fill in the token information and save.
Copy the token:
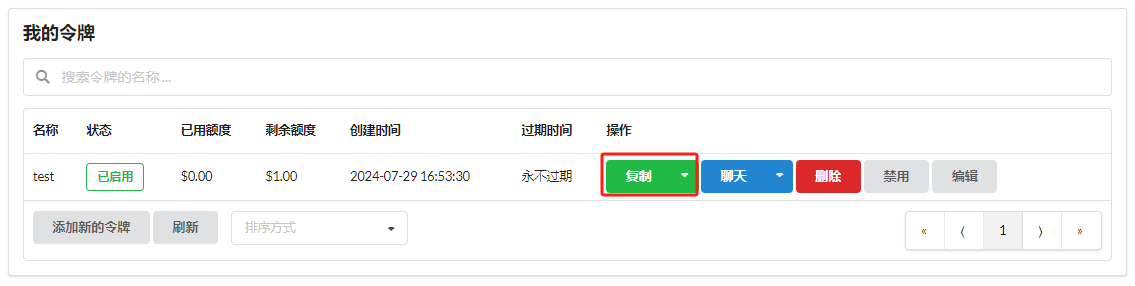
You can now use the token and API address (http://localhost:3000) to call one-api's API.
curl http://localhost:3000/v1/chat/completions \
  -H "Content-Type: application/json" \
  -H "Authorization: Bearer sk-PQtiDuMUpYUtzHjtF4B60c47566b44699f4b33Ed480160De" \
  -d '{
    "model": "gpt-4o-mini",
    "messages": [
      {
        "role": "user",
        "content": "Hello!"
      }
    ]
  }'

# Response
{
  "id": "chatcmpl-9qGUJ9P4QinHWPMTIHjny47Sp665T",
  "object": "chat.completion",
  "created": 1722243463,
  "model": "gpt-4o-mini-2024-07-18",
  "choices": [
    {
      "index": 0,
      "message": {
        "role": "assistant",
        "content": "Hello! How can I assist you today?"
      },
      "logprobs": null,
      "finish_reason": "stop"
    }
  ],
  "usage": {
    "prompt_tokens": 9,
    "completion_tokens": 9,
    "total_tokens": 18
  },
  "system_fingerprint": "fp_ba606877f9"
}
Nginx Forwarding
If you want to expose one-api to the internet, use Nginx for forwarding:
map $http_upgrade $connection_upgrade {
     default upgrade;
     'websocket'      upgrade;
}
server {

    listen 80;
    server_name  api.abc.com; # Replace with your domain


    location / {
        proxy_http_version 1.1;
        proxy_connect_timeout 300s;
        proxy_read_timeout 300s;
        proxy_send_timeout 12s;
        proxy_set_header Host $host;
        proxy_set_header X-Real-IP $remote_addr;
        proxy_set_header X-Forwarded-For $proxy_add_x_forwarded_for;
        proxy_pass http://127.0.0.1:3000;
    }
}
Now you can access one-api via http://api.abc.com.
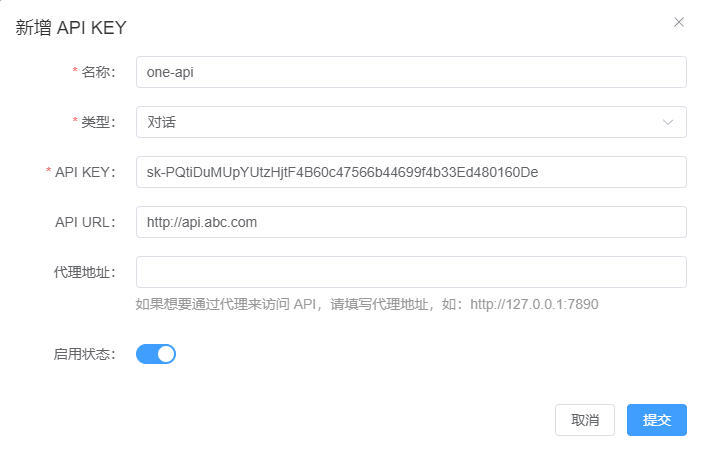
GeekAI Configuration
Configuring your own one-api in GeekAI is simple. Log in to the admin dashboard, select the "API-KEY" menu, click "Add API-KEY," and fill in the API information.
Common Error Handling
In the GeekAI chat window, errors like "Failed to request OpenAI API" usually indicate issues with the upstream API provider. Refer to the solutions below. If the issue persists, report it in the GeekAI WeChat group.
Note: The recommended API providers have representatives in the group, but they will only handle issues related to their own APIs. When reporting a problem, always include the website where you purchased the API (e.g., https://api.aiggr.com). Otherwise, no one will respond.
- No Available Channels or Saturated Upstream Channels

As explained earlier, this error occurs when the relay's account pool has no available accounts. Since API accounts have rate limits, high usage can trigger this. Solutions:
- Retry later; resources may become available.
- If the issue persists, the relay provider may need to add more accounts. Notify them in the group.
- Use multiple relays. GeekAI allows adding multiple API KEYs for round-robin calls. Disable problematic relays and enable them once fixed.
- Relay API Timeout
- Relay APIs are usually hosted abroad, so some regions may experience slow access. Ensure your firewall or network is not blocking requests. Try whitelisting the relay domain or manually resolving it in the hosts file.
- High traffic on the relay can cause timeouts. Notify the provider in the group.
- Backend Error: API Address Not Whitelisted
GeekAI Plus only supports tokens from the recommended relay APIs. To remove this restriction:
- Use the open-source community edition, which has no restrictions.
- Contact the author to purchase a Plus license.
- Service Starts but http://localhost:8080 Fails to Load
Possible causes:
- Browser shows a 502 error: Check if the API container (
geekai-plus-api) is running. - Page fails to load: Check if port 8080 is occupied, preventing the web container (
geekai-plus-web) from starting. - If the web container is running but inaccessible, check if the server's firewall allows port 8080.