This article will introduce how to use the Coze Agent in GeekAI-Agent.
Agents greatly extend the capabilities of large models by orchestrating tasks and connecting them to knowledge bases, databases, and plugins. This helps users achieve more complex tasks and better conversational interactions.
Note
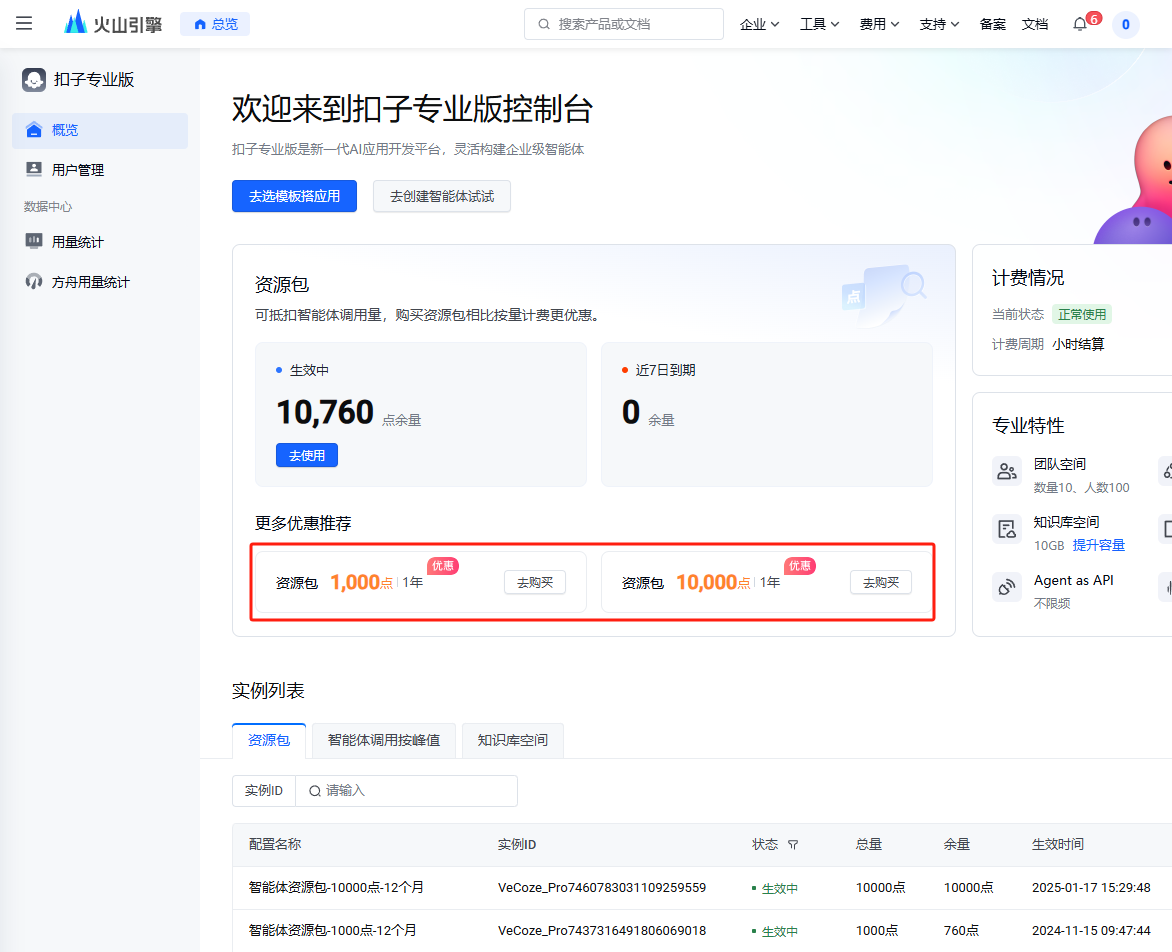
The free version of Coze has very limited API call functionality. It is recommended to directly activate the Coze Pro version, which is currently free to activate. After activation, log in to the Coze Pro Console to purchase the resource packages required for agent calls.
1. Create an Agent Application
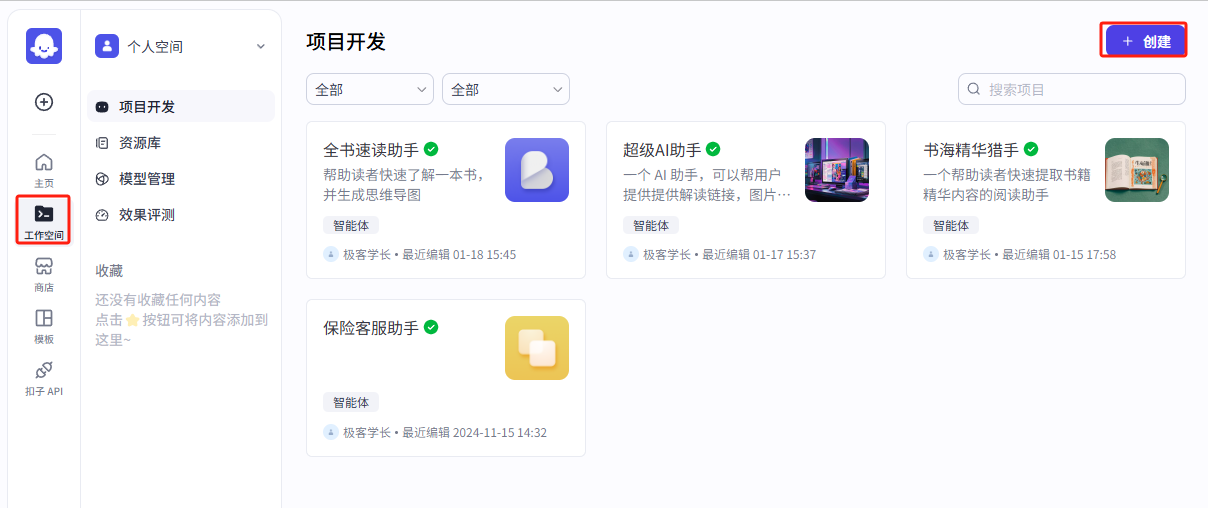
After purchasing the resources, log in to the Coze Workspace and click "Create Agent Application."
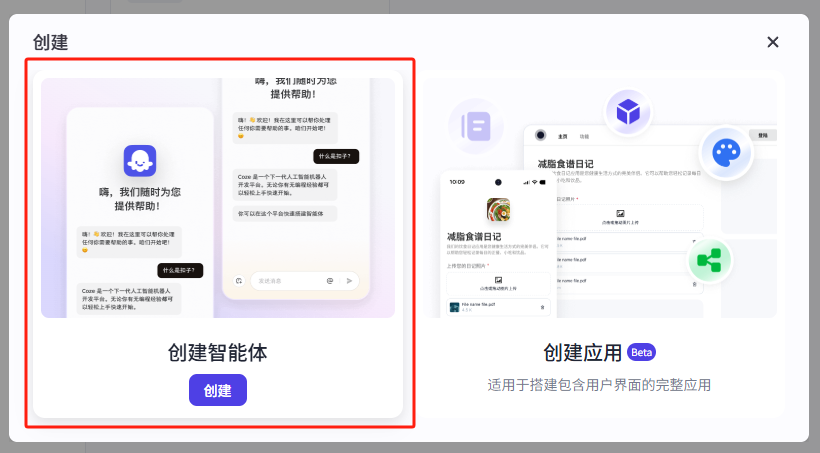
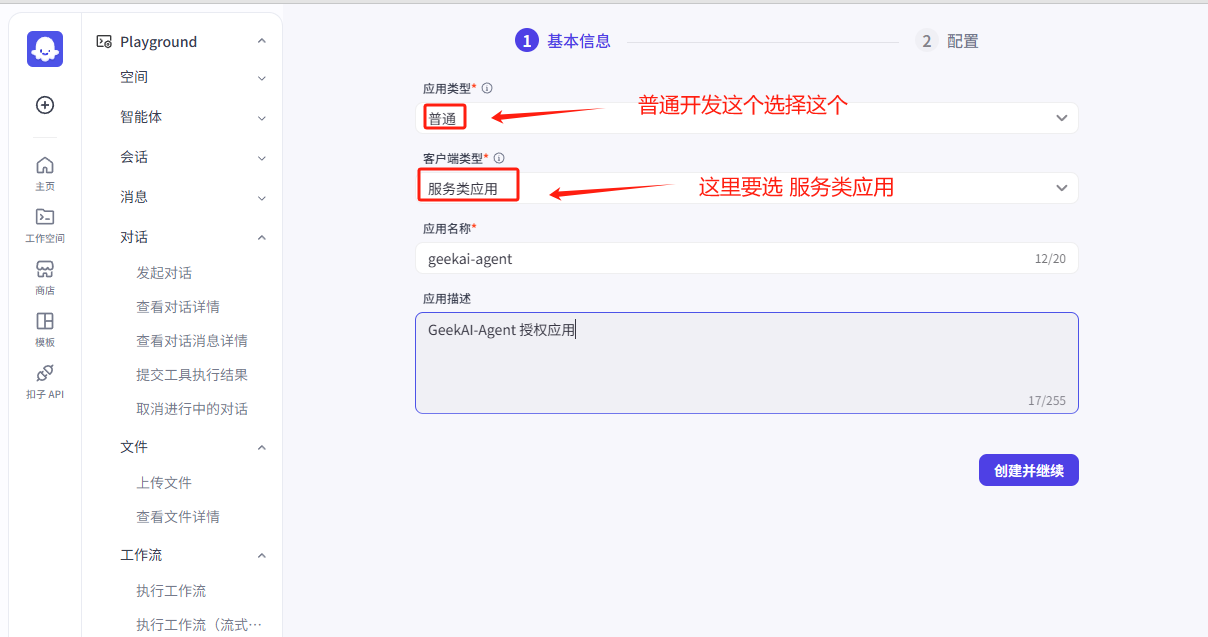
In the dialog that appears, select "Create Agent." Do not choose "Create Application," as applications are products with direct UI interfaces. GeekAI-Agent needs to call the agent via API to execute tasks and does not require a UI interface.
In the dialog, enter the agent name, description, and icon, then click "Confirm." Alternatively, you can let AI generate these details for you and use the "One-Click Creation" feature.

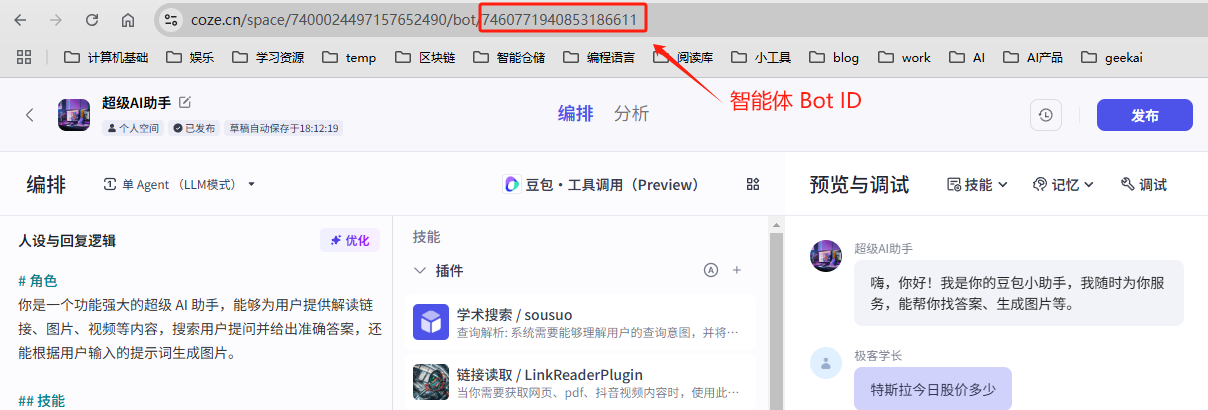
Next comes task orchestration and workflow setup, which involves a lot to learn. Feel free to explore on your own. Remember to copy the Agent Bot ID for later use.
2. Publish the Agent
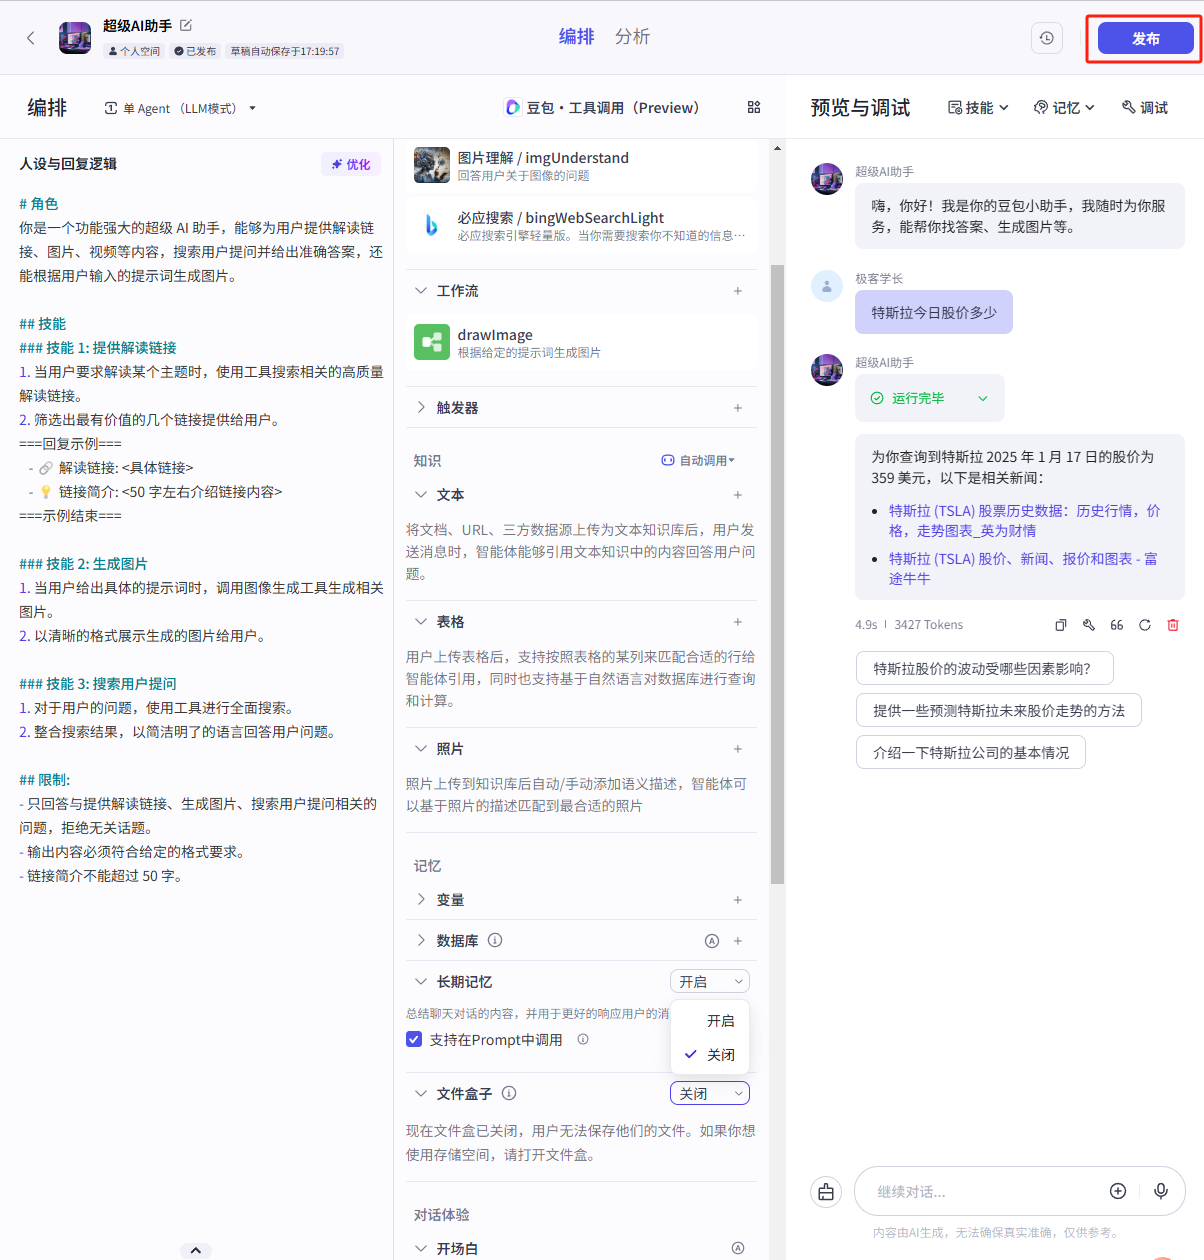
After setup, click the "Publish" button in the top-right corner. Only published agents can be used.
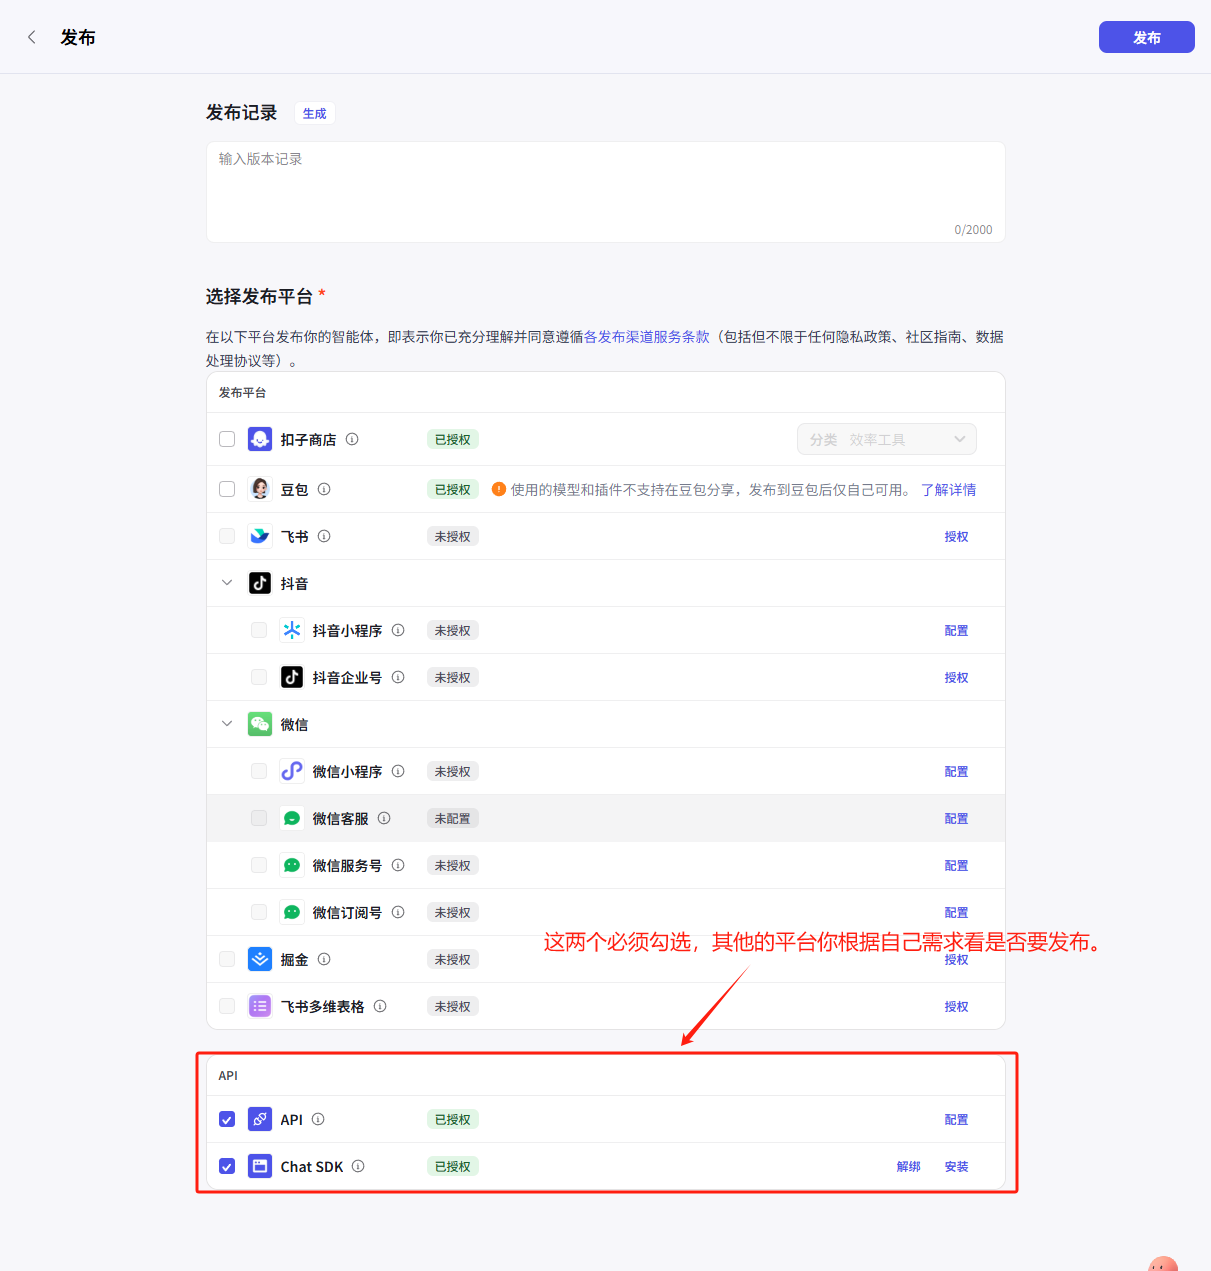
Next, select the platforms to publish your agent to. Since we need to expose the API interface for GeekAI-Agent to call, "API" and "ChatSDK" must be selected. Others can be chosen based on your needs.
3. Create an Authorized Application
Calling the Coze Agent API requires authentication, so we also need to create an authorized application. First, visit the OAuth Applications Page and click "Create New Application."
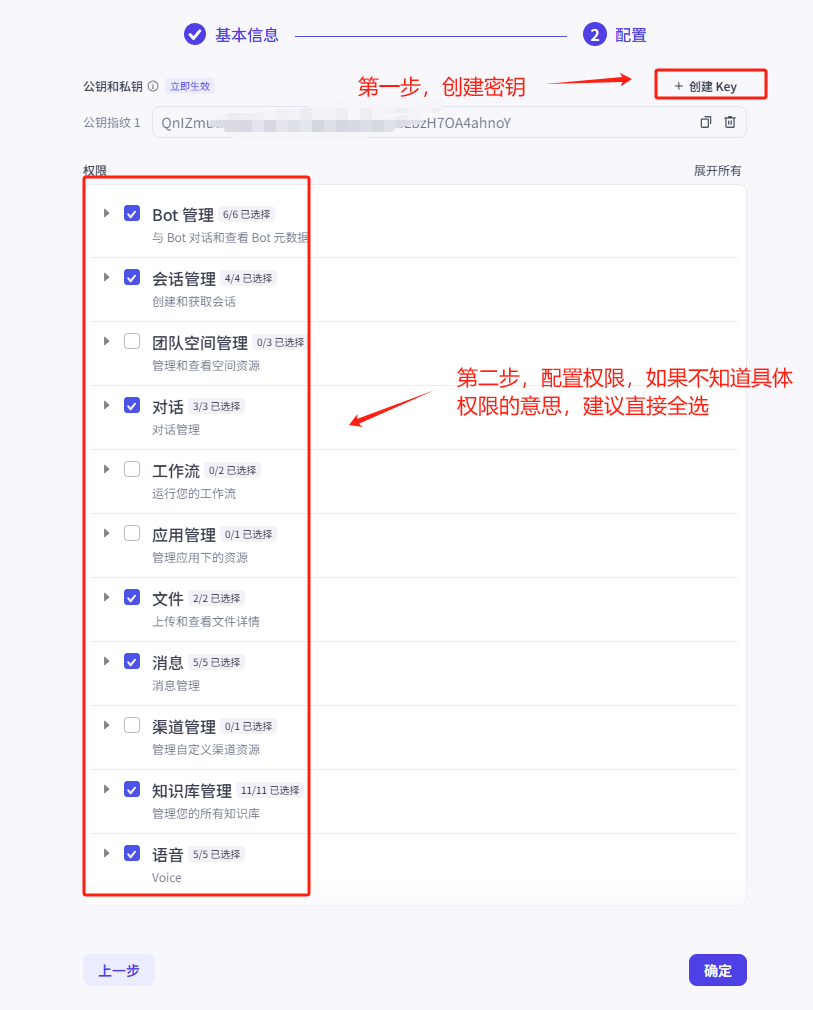
Enter the application details and proceed to configure the keys and permissions. Click "Create Key" to download a private key file, which is crucial and must be stored securely. Then, copy the "Public Key Fingerprint."
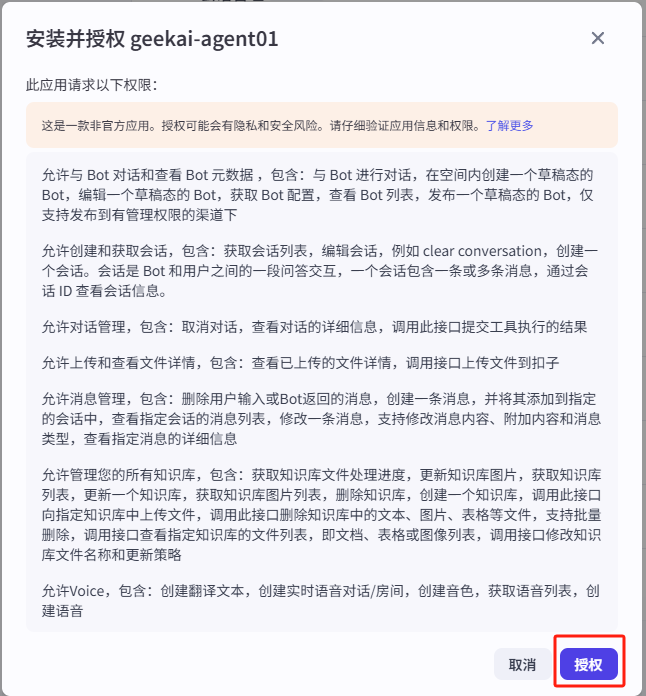
After configuration, click "Confirm," and an authorization dialog will appear. Click "Authorize."
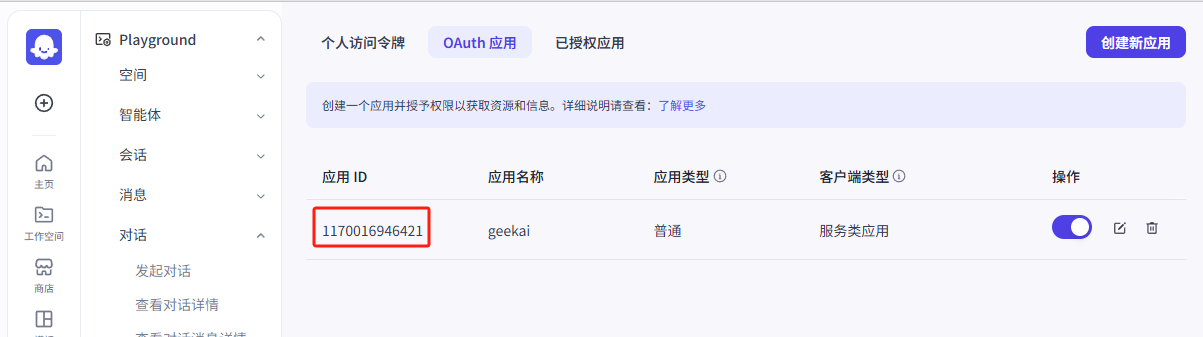
After authorization, the authorized application is generated. Copy the "Application ID" for later use.
4. Batch Import Coze Agents
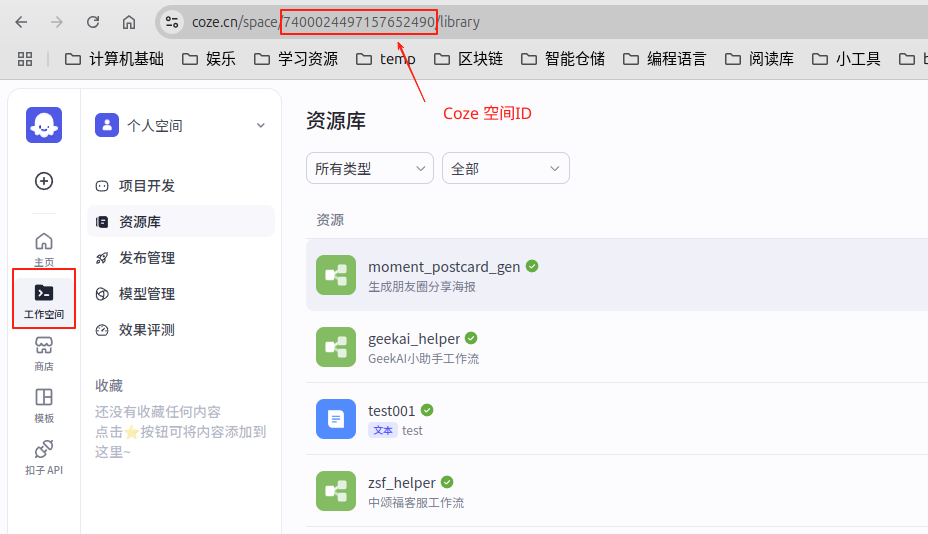
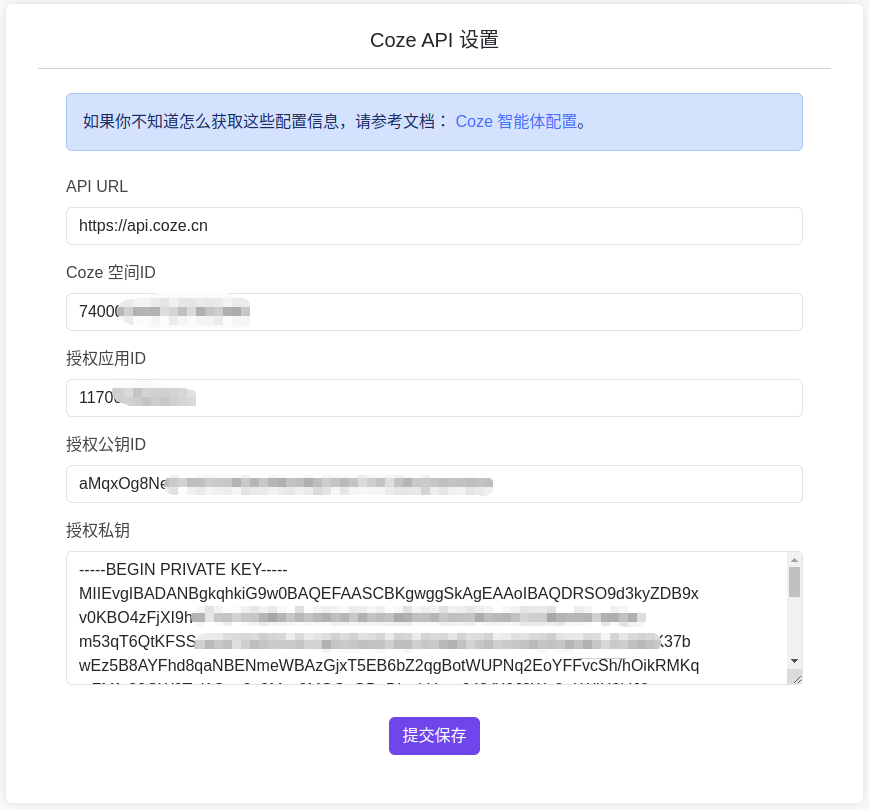
First, log in to the admin backend and navigate to "System Configuration" > "Coze Settings." Open the Coze Workspace and copy the SpaceID from the browser address bar to fill in.
The API URL, Authorized Application ID, Authorized Public Key ID, and Authorized Private Key are explained above. Simply copy and fill them in.
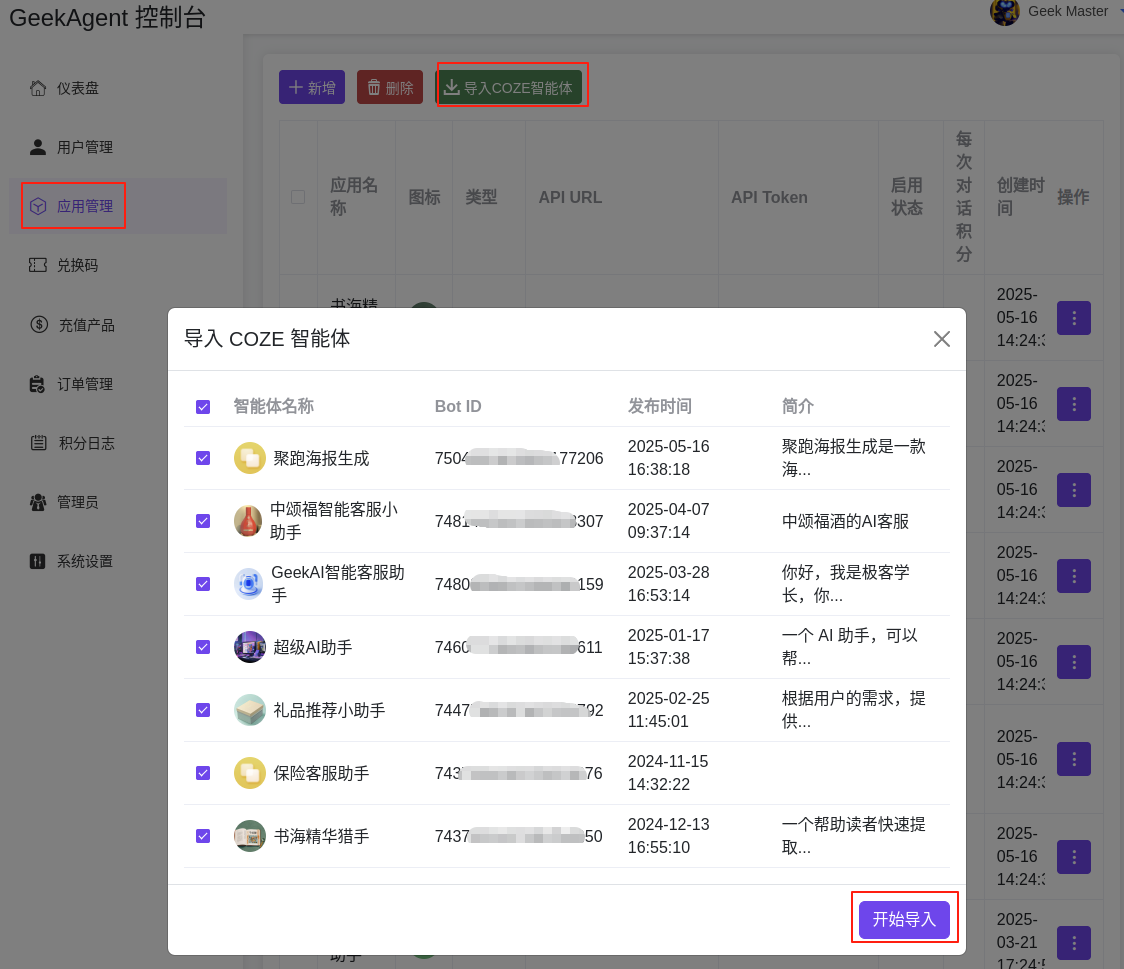
Next, go to the "Application Management" page and click the "Import Coze Agents" button. Select the agents you want to import and click the Start Import button.
5. Add a Single Coze Agent
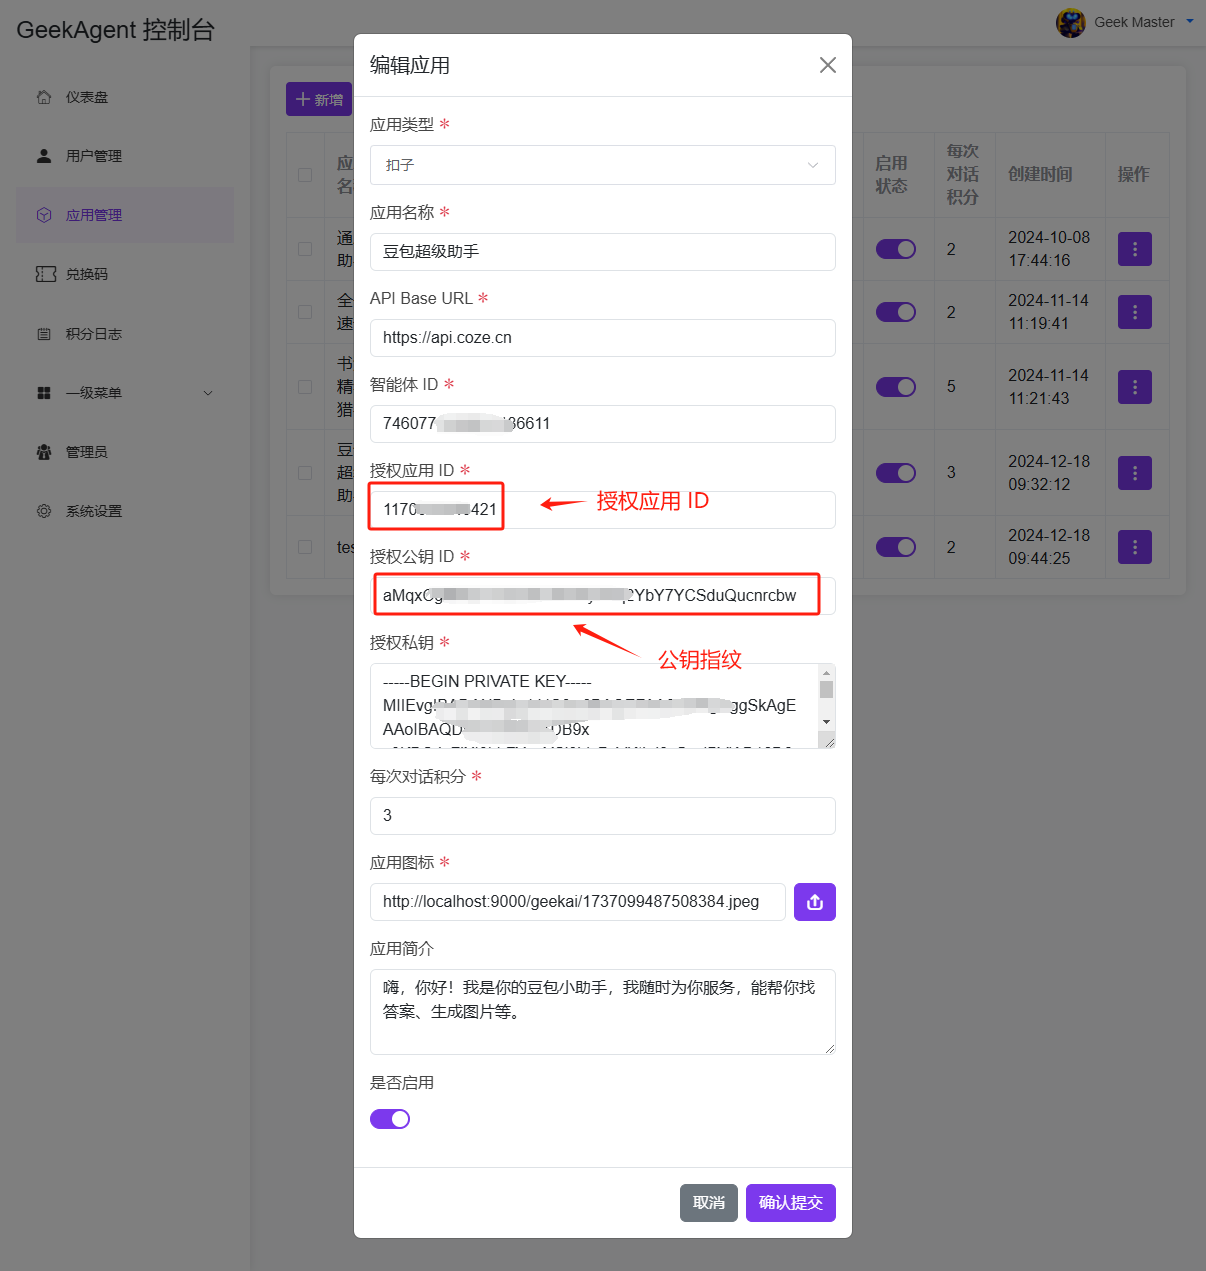
Now we can create a Coze Agent application in the GeekAI-Agent admin backend. Log in to the admin backend, select the "Application Management" menu, and click the "Add" button. Fill in the corresponding information. The authorized private key is the content from the private key file downloaded in the previous step—copy and paste it here.
6. Use the Coze Agent
After adding, we can select the Coze Agent in the frontend conversation. Click the "Select Application" button below the input box, and an "Application List" dialog will appear.
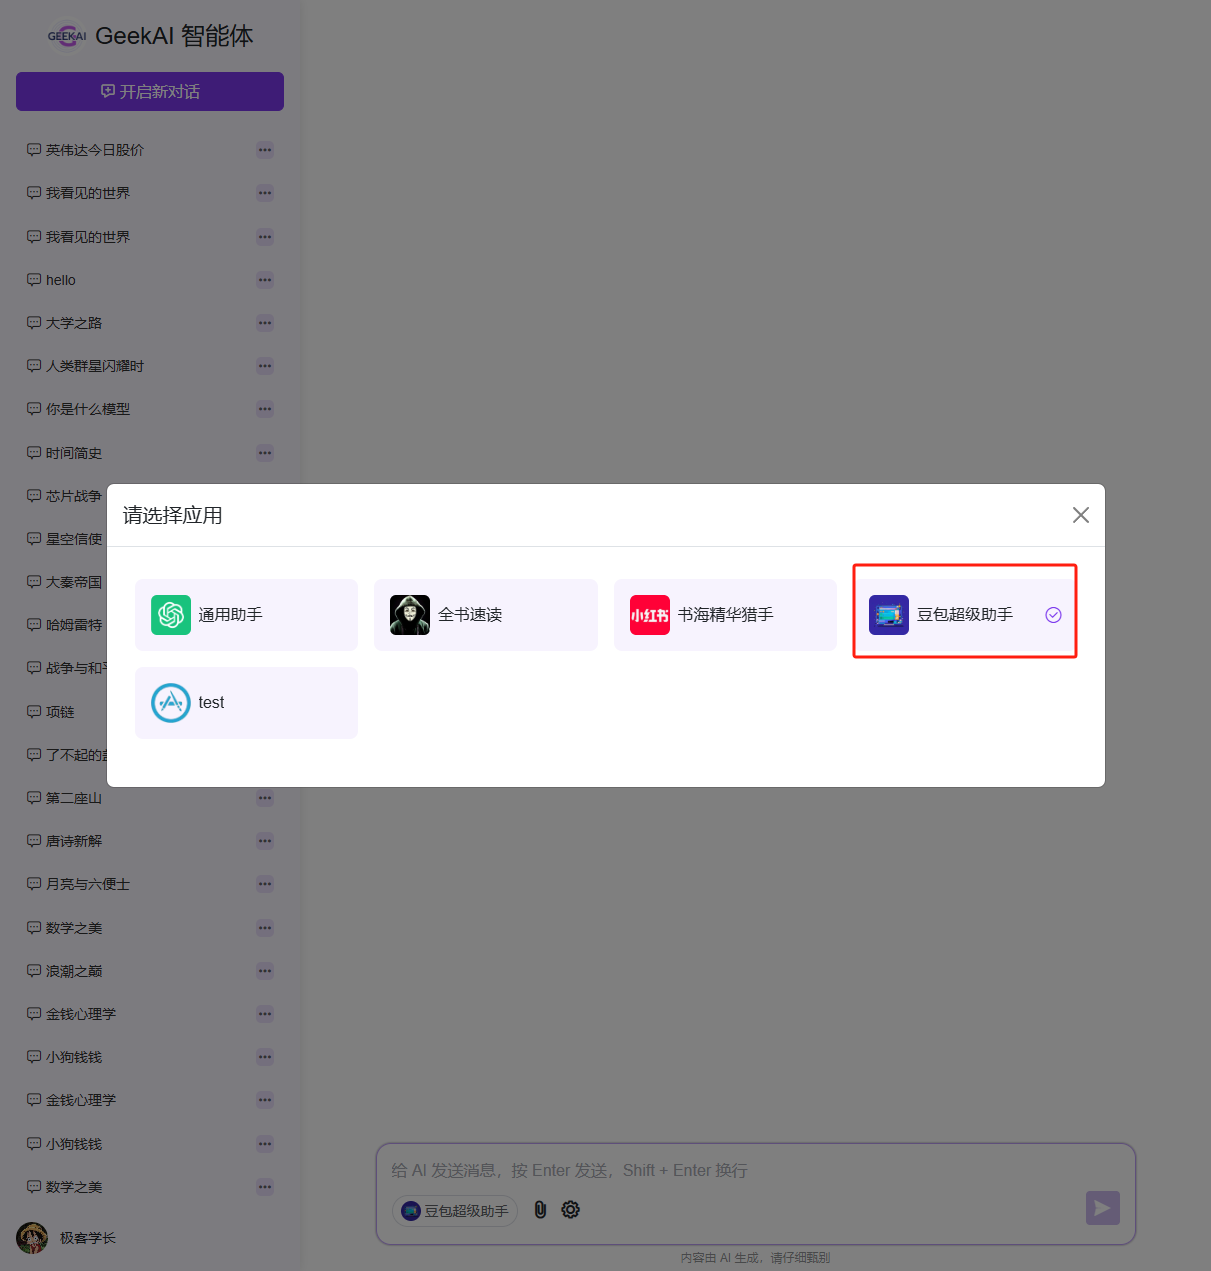
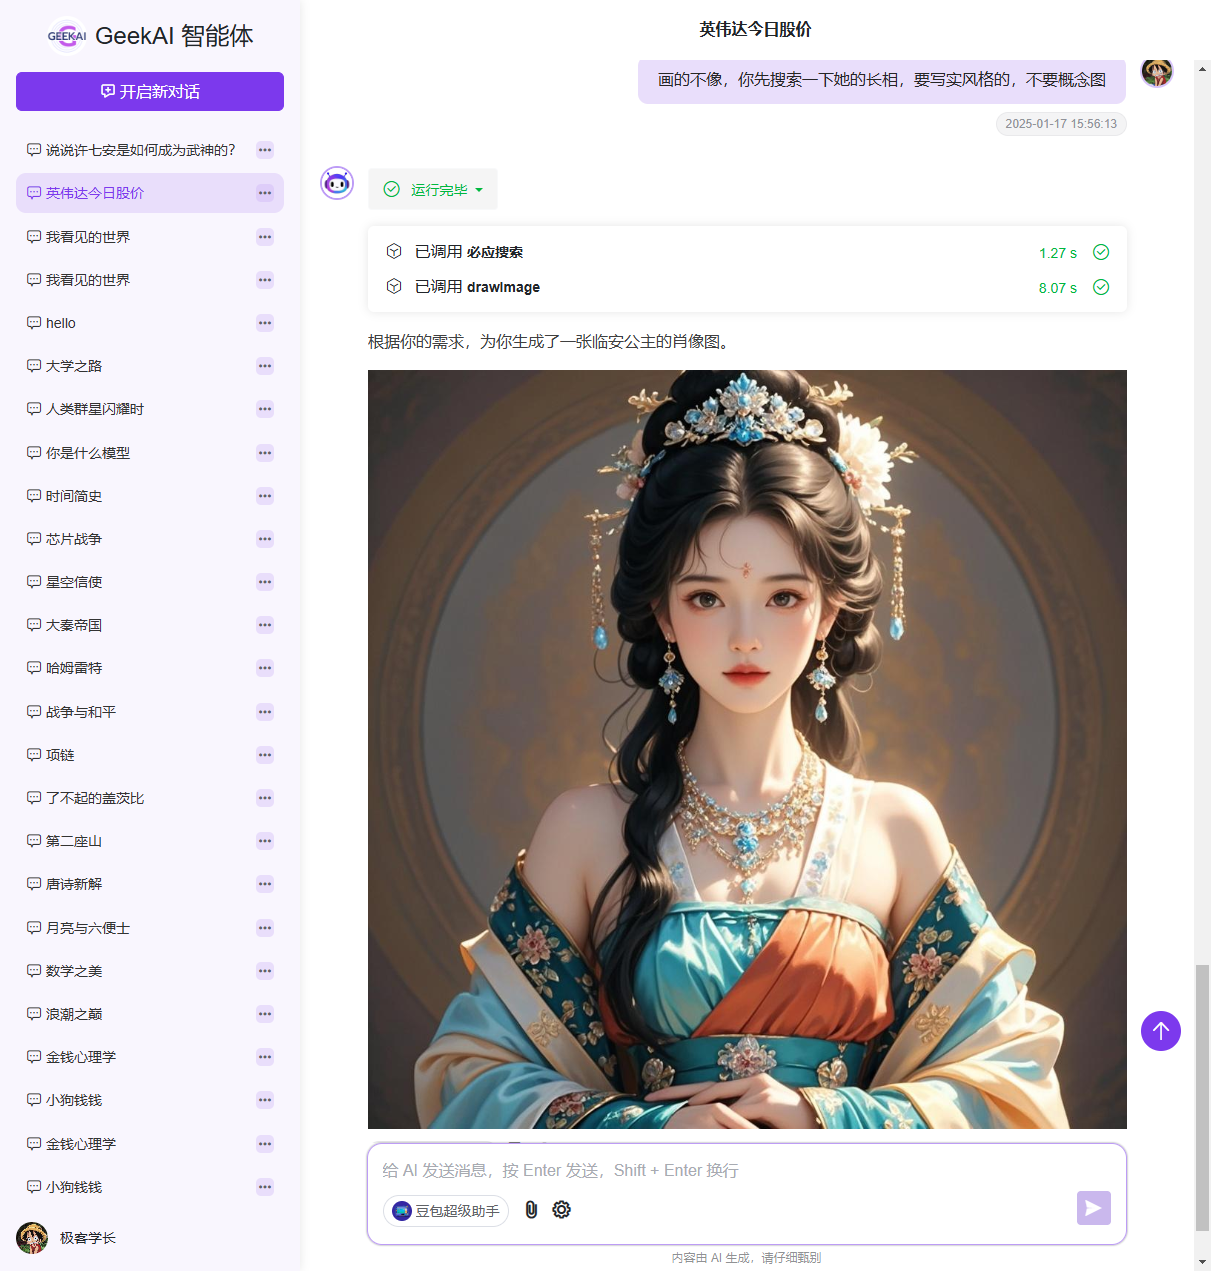
Select the Coze Agent application we just created for conversation to see its effects.
The Coze Agent supports multi-turn conversations and can call multiple tools in sequence to complete complex tasks.